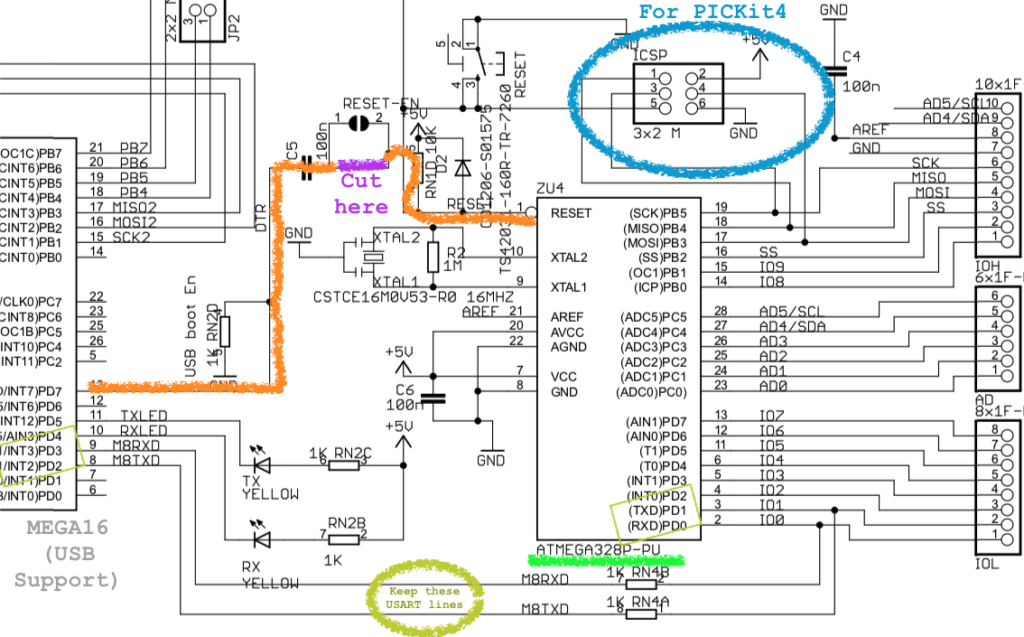
To allow the UNO to be programmed by the PICKit 4 via the ICSP header (circled in blue, below), we need to cut the reset signal trace that links the '328P processor to the USB Bridging chip that is also found on the UNO, the MEGA16U2. There are also two other wires that we won't cut, the USART RX and TX lines, because we want to continue to use those to permit us to later write programs that allow the ATMEGA328P to send and receive serial information via the USB line to our computer. In the image below we will be cutting the circuit trace shown in orange at the segment shown in fuchsia.
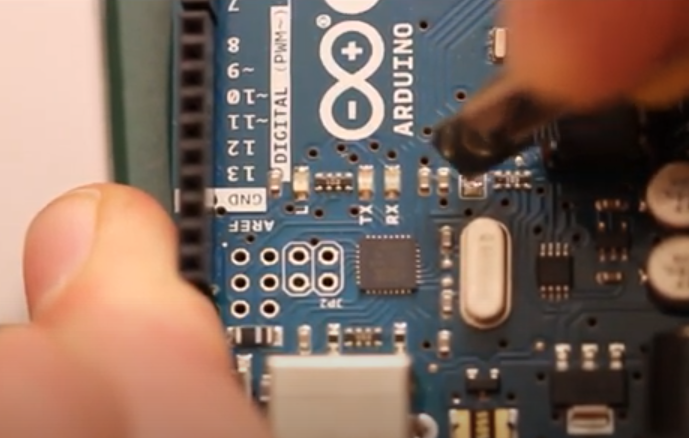
The cutting can be done with a knife like I show in the video and illustrated here:
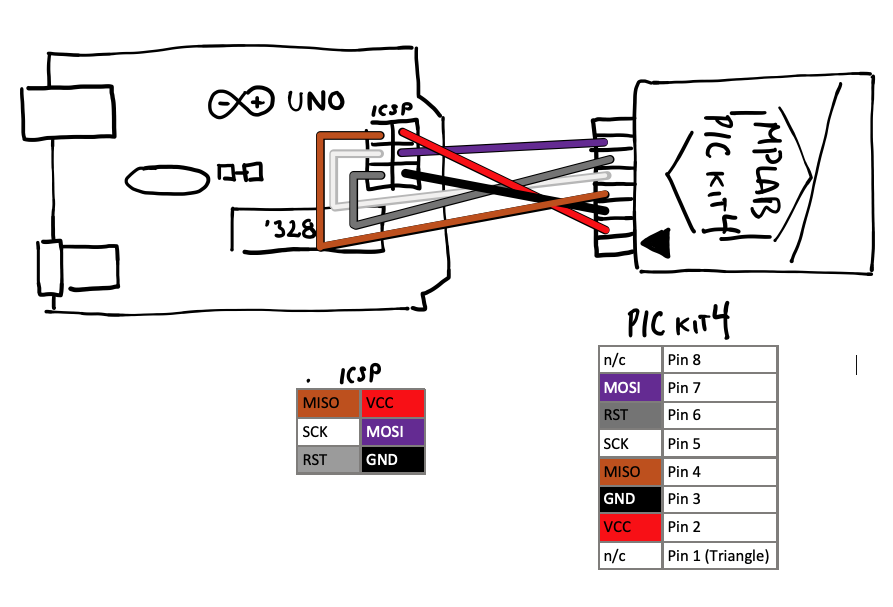
After you cut the trace you can wire up the PICKIT4 and Arduino like this:
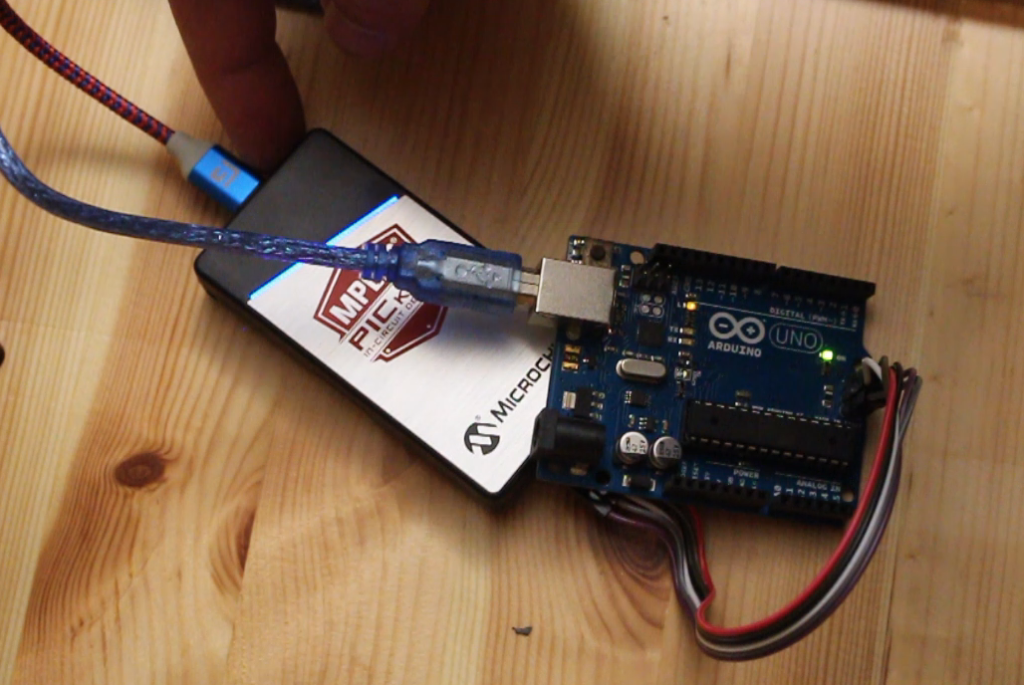
After you've wired up the two devices and powered them up by connecting up the USB cables to each, you can start programming the board in MPLAB X. I recommend pulling the memory contents off the ATMEGA328P chip first, just in case you want to restore the Arduino later. The process is described in this video on YouTube.
MPLAB X allows for reading and writing the "fuse" bits on the Arduino's ATMEGA328P. The traditional way is described here. In MPLAB X you can view the configuration memory and then copy out the existing configuration fuses:
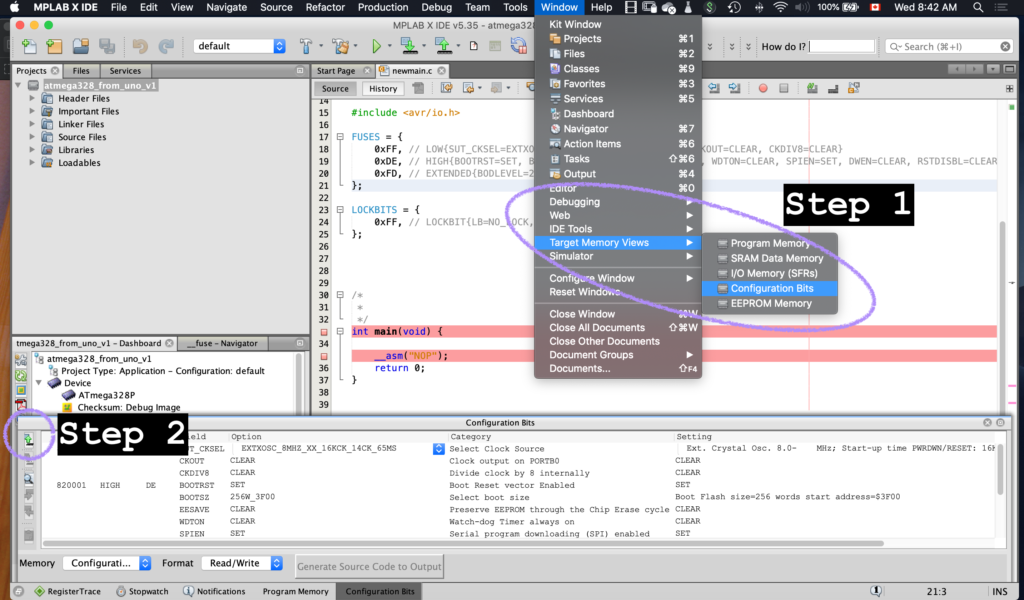
After the bits are read, MPLAB X can provide the C-code equivalent that you can incorporate into your own program. Here is what was provided when I pulled the Uno's configuration bits:
#include <avr/io.h>
FUSES = {
0xFF, // LOW{SUT_CKSEL=EXTXOSC_8MHZ_XX_16KCK_14CK_65MS, CKOUT=CLEAR, CKDIV8=CLEAR}
0xDE, // HIGH{BOOTRST=SET, BOOTSZ=256W_3F00, EESAVE=CLEAR, WDTON=CLEAR, SPIEN=SET, DWEN=CLEAR, RSTDISBL=CLEAR}
0xFD, // EXTENDED{BODLEVEL=2V7}
};
LOCKBITS = {
0xFF, // LOCKBIT{LB=NO_LOCK, BLB0=NO_LOCK, BLB1=NO_LOCK}
};
Here is the video summary of the process.