[this is a draft... it needs to be cleaned up.]
I'm using MATLAB 2019b, whereas you are probably using something a little newer, like 2020b. It shouldn't make much (if any) difference.
Open up MATLAB and then go to Add-ons and check out the Hardware support packages.
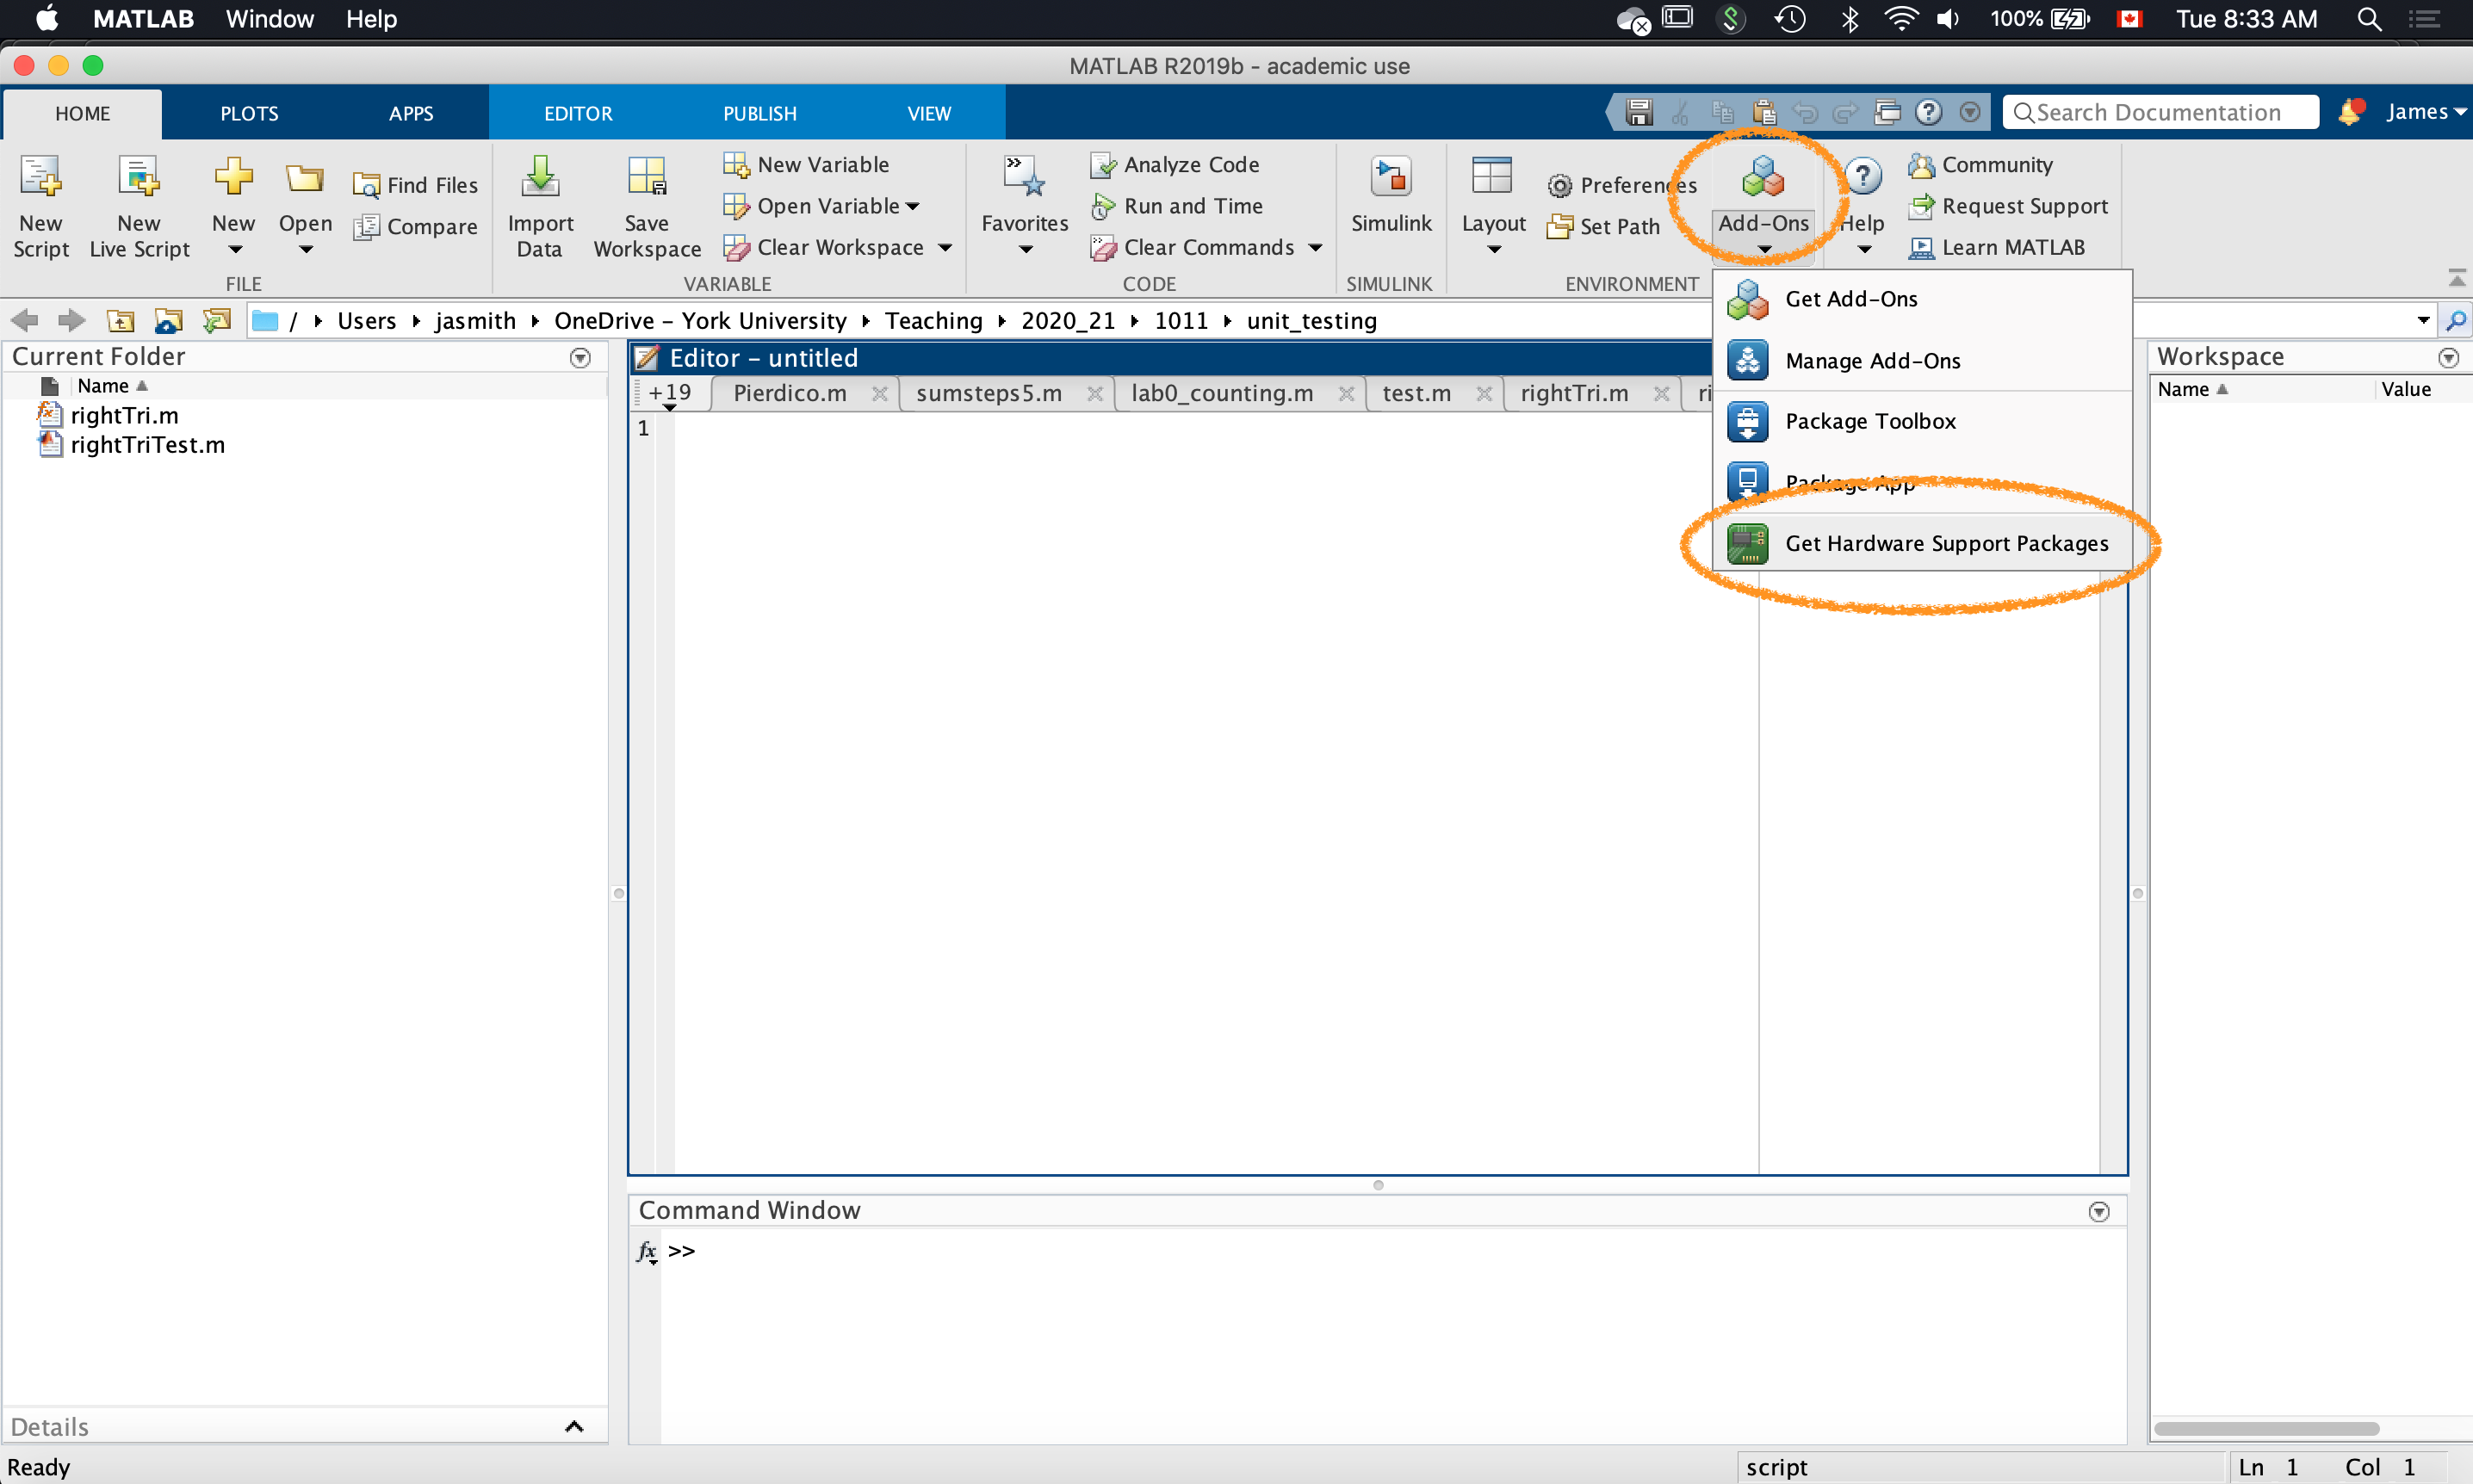
hardware support packages are found in Add-ons (2019b release)
You'll be greeted with a list of all kinds of hardware that Matlab supports. We're looking for for "MATLAB support package for Arduino Hardware" (not the "legacy" version). Click on the version we want.
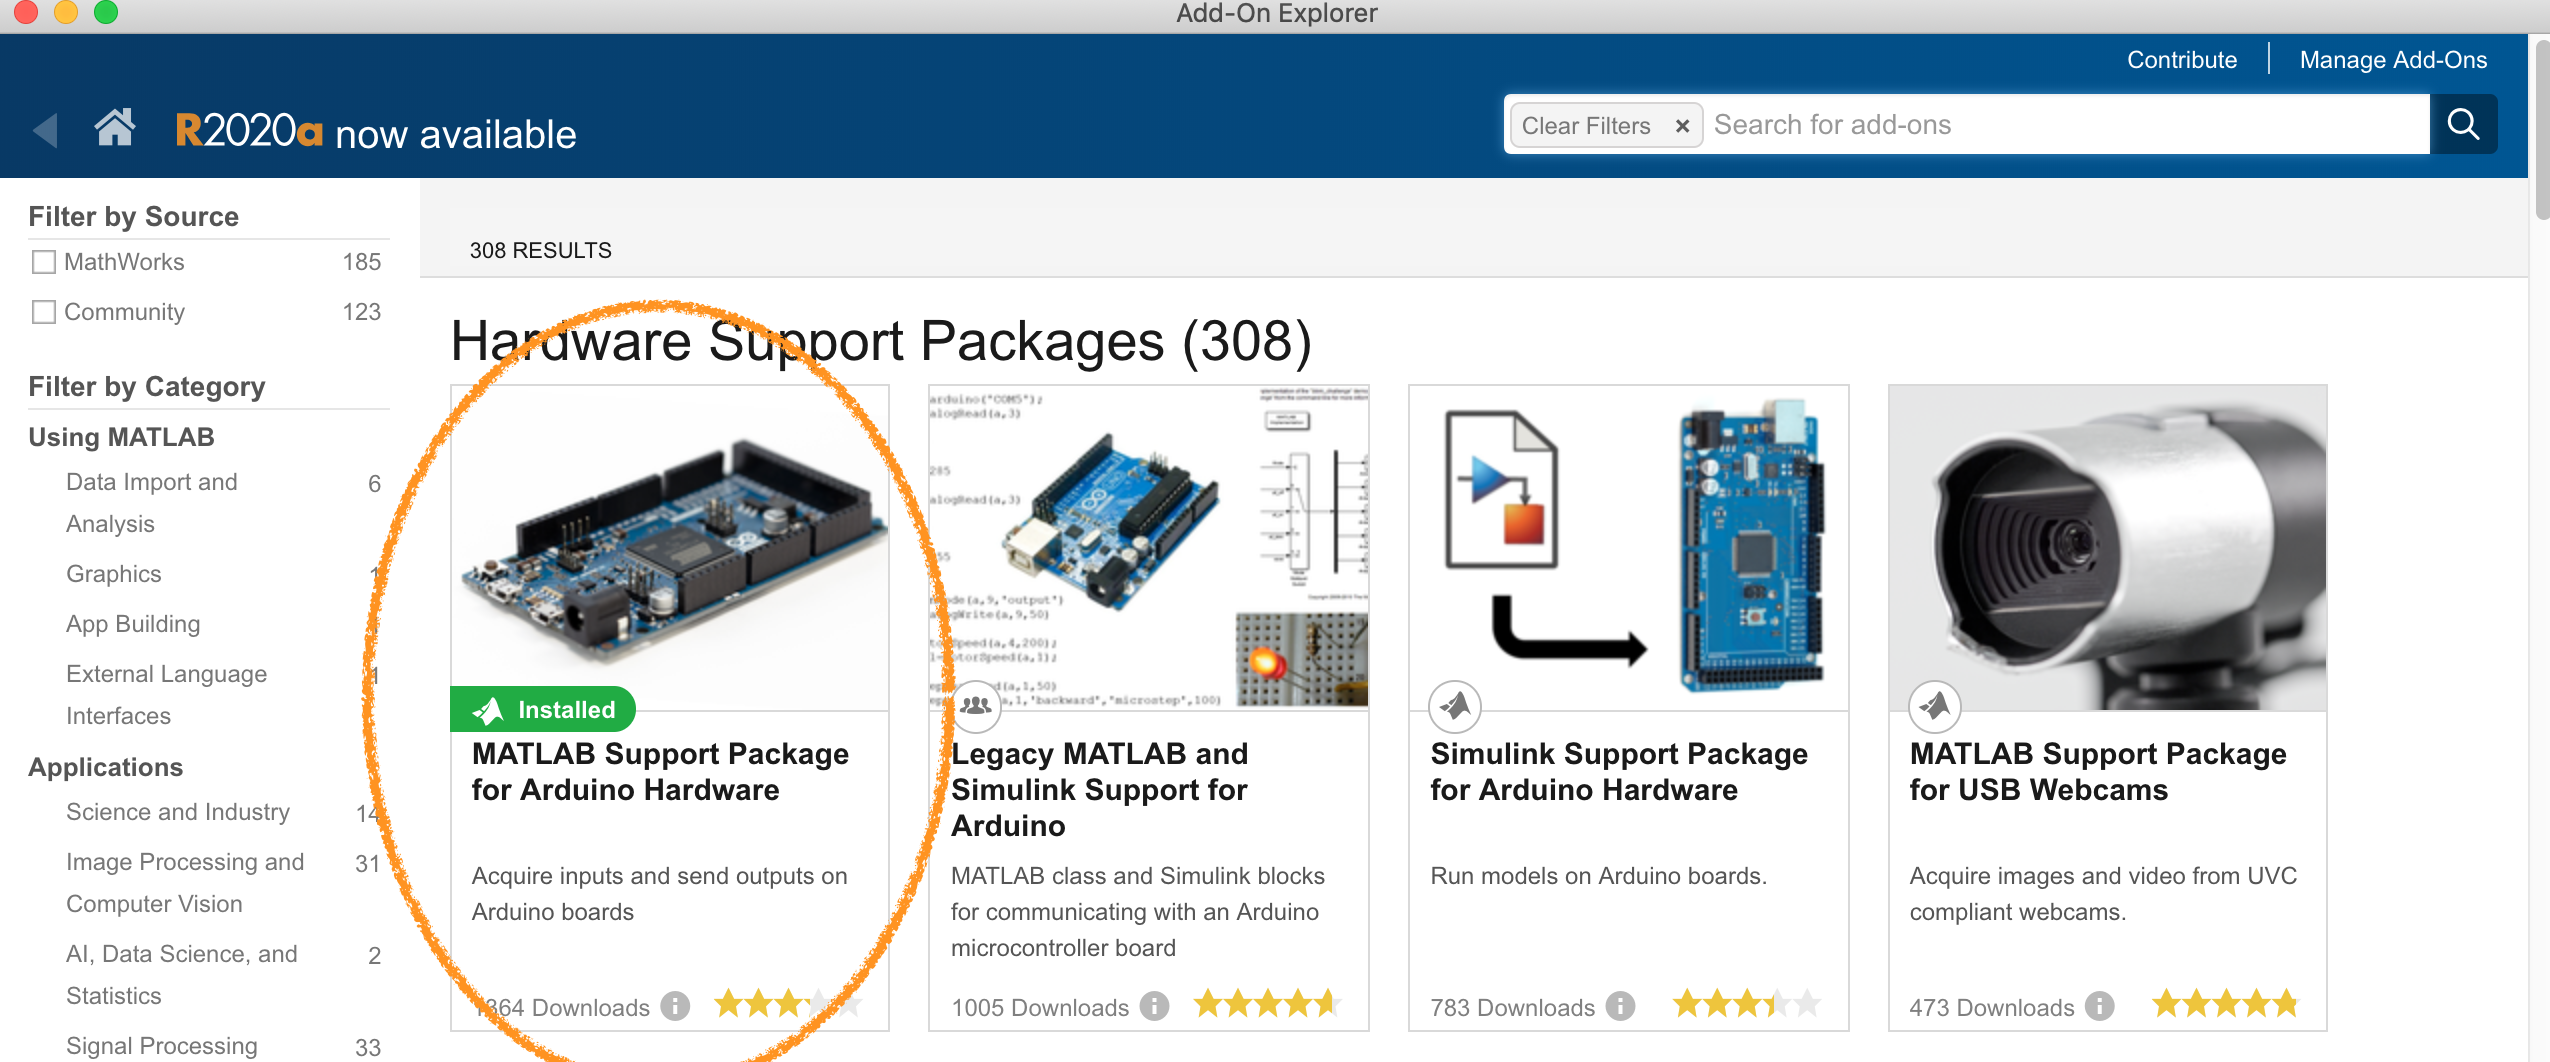
Arduino Support for Matlab. In my case, it's already installed, as you can see by the green label.
You'll be greeted with a new window that describes the package we want. Install it by following the instructions. Use the "add" icon on the right of the screen to do that.
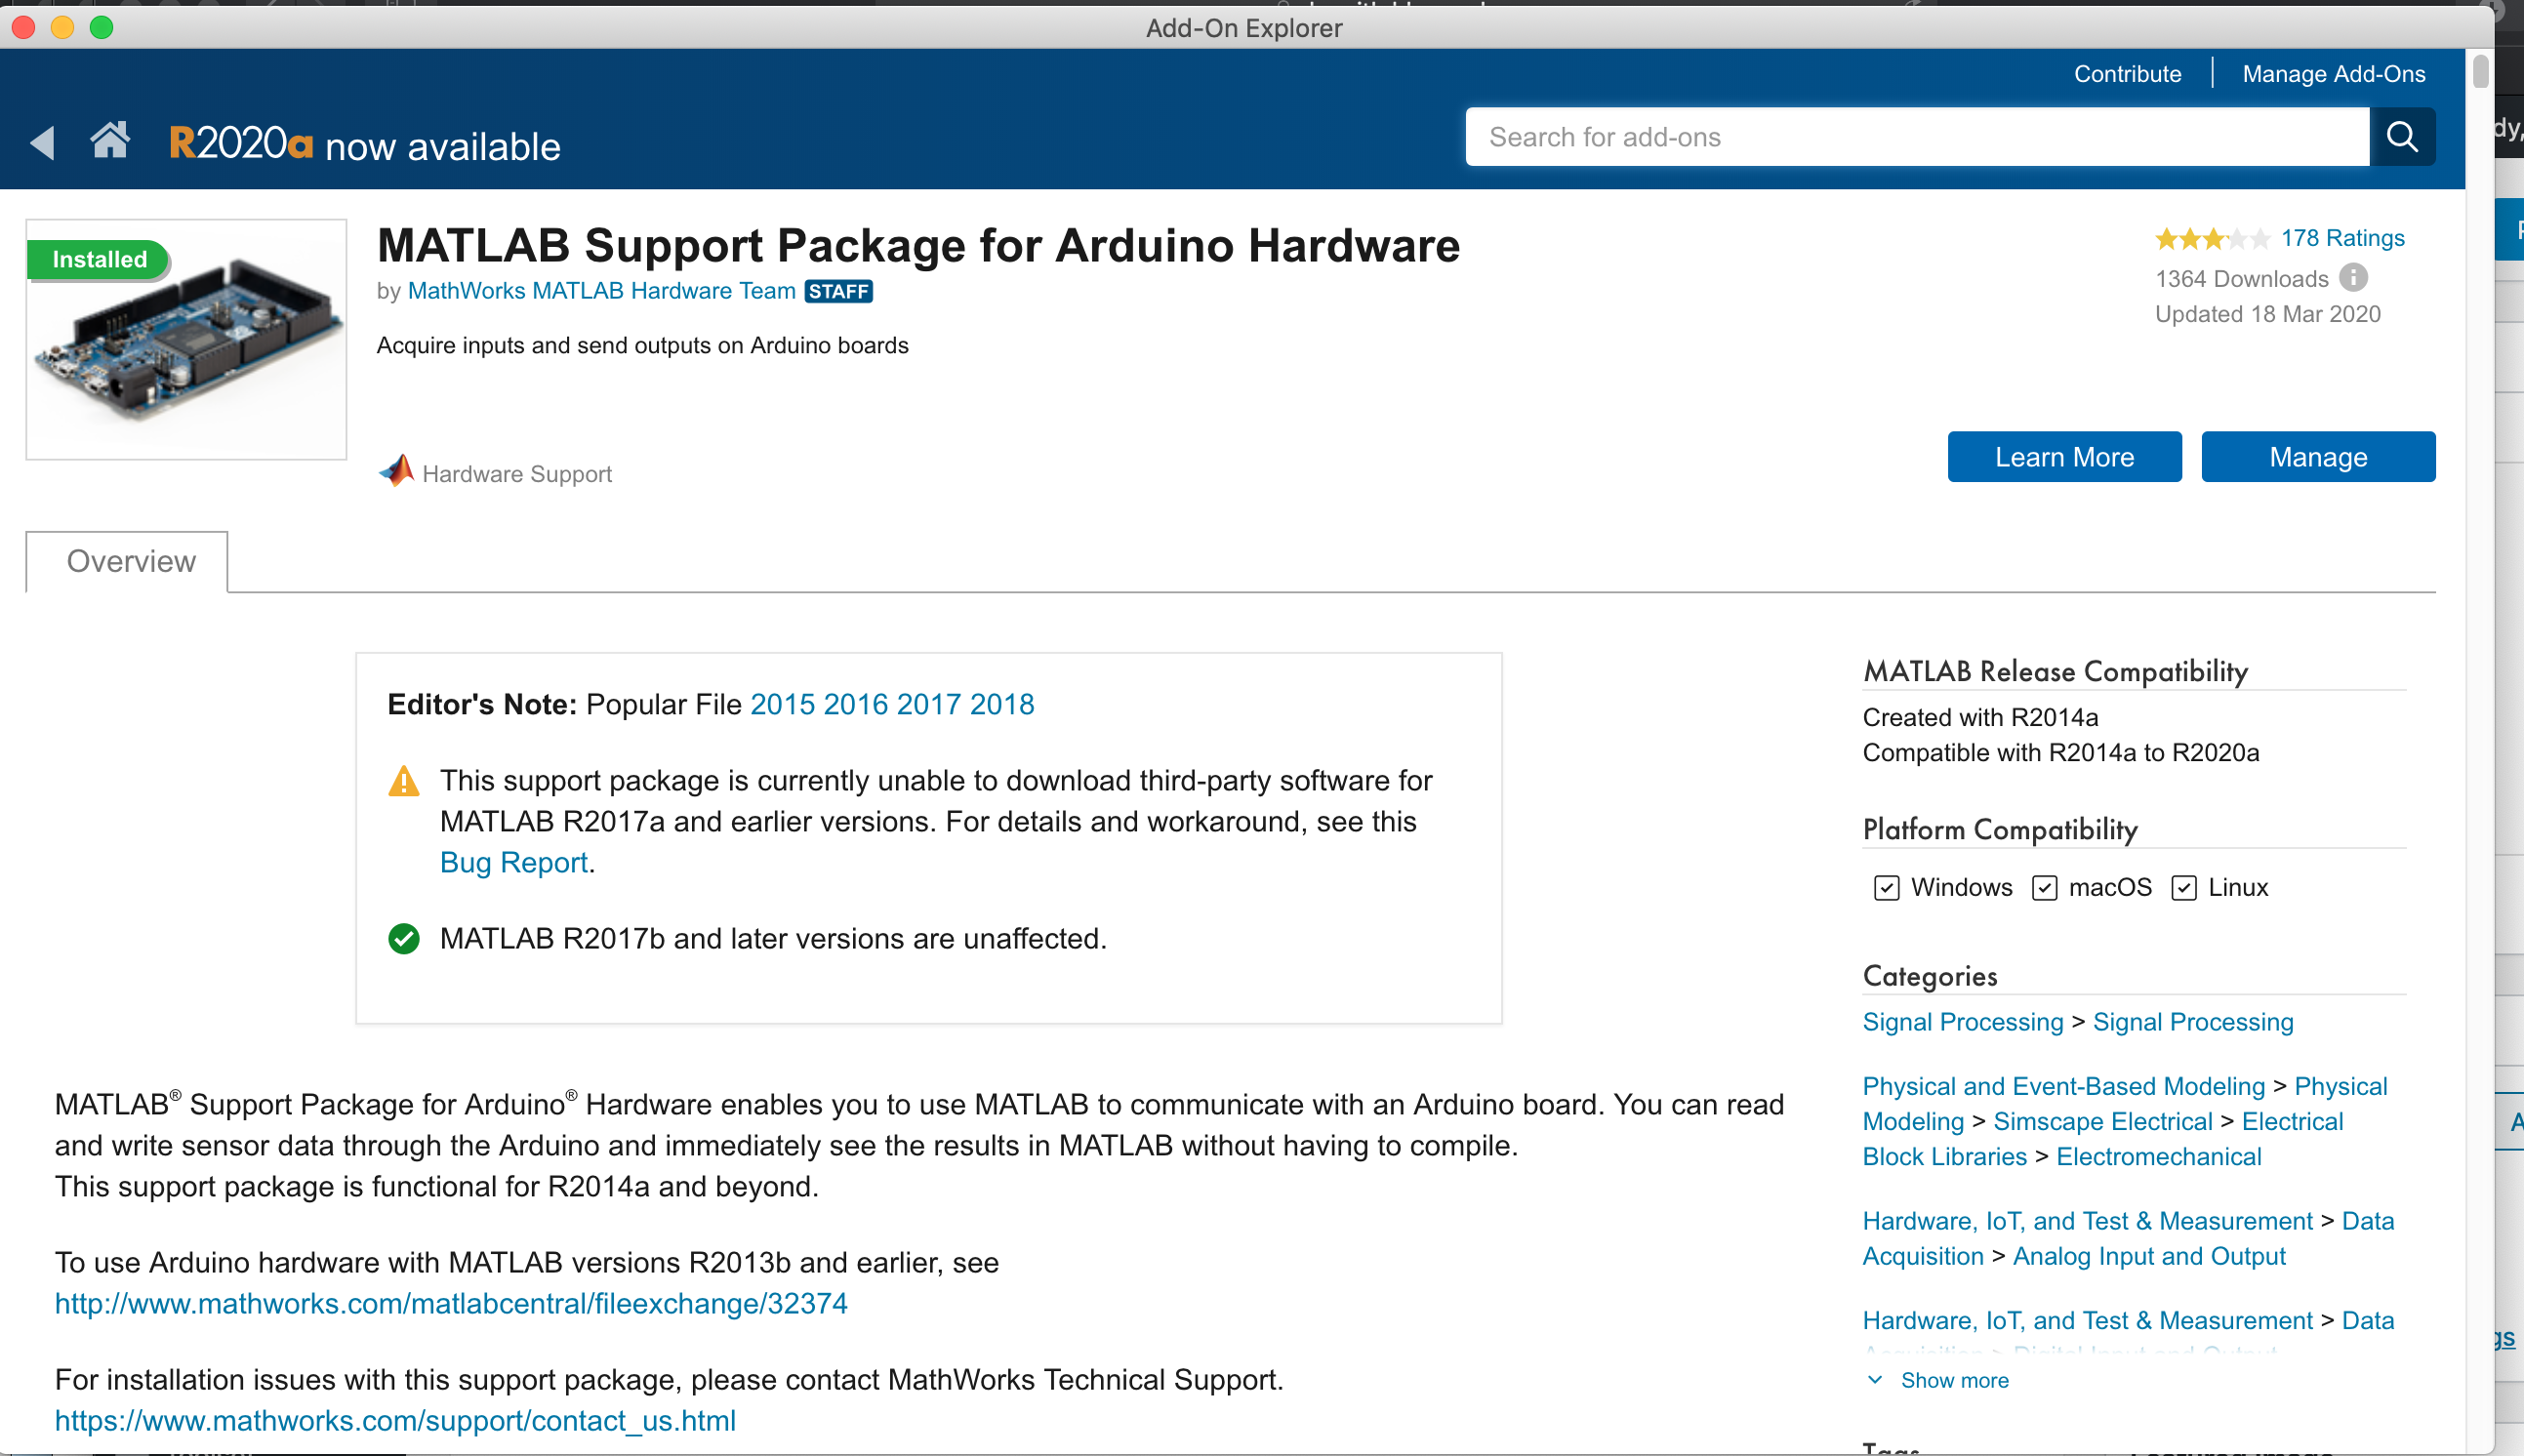
Manage your Arduino for Matlab package. If you have already installed it the screen will look like this. If it's your first time, then look for the "add" button.
Once it's installed, go to the terminal in Matlab and type in
a = arduino();
if it's found, then you're all good to go and you an proceed with a tutorial like the one that The Mathworks suggests. But what if you get an error, like I did? First, check your setup to see that stuff is plugged in right and that lights are on / blinking, like on the SparkFun RedBoard in the image below.
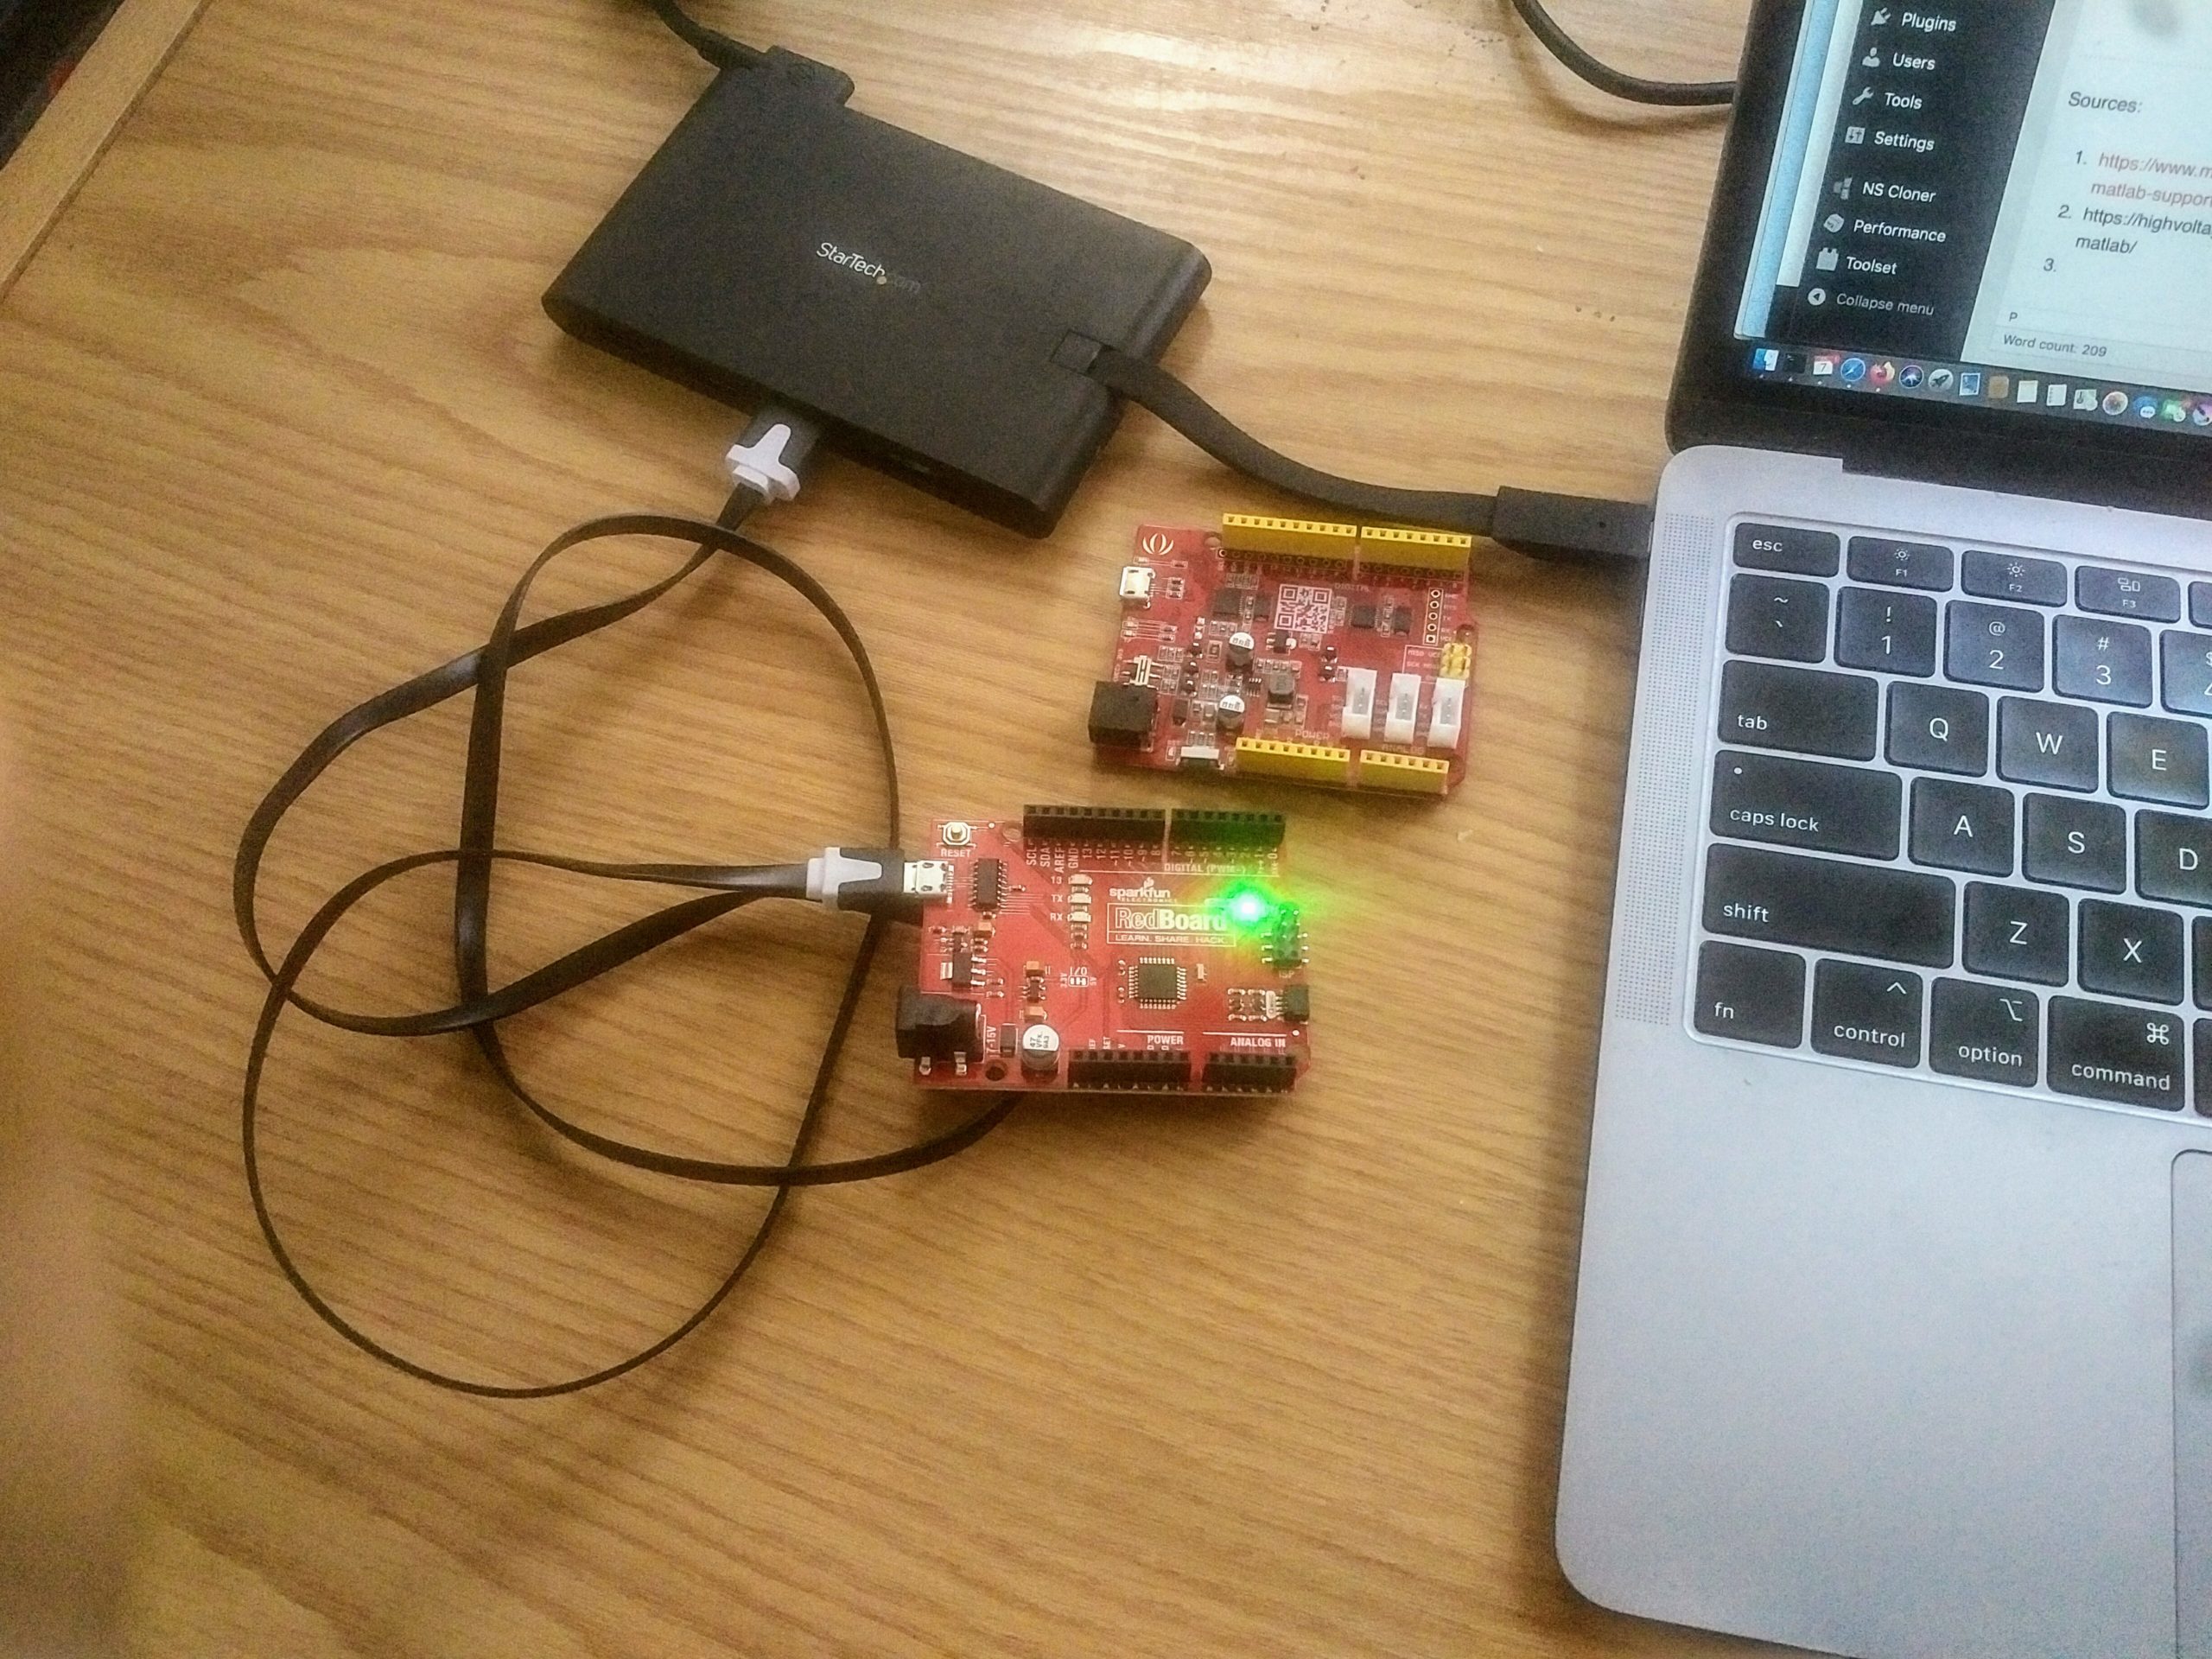
Arduino Uno compatible boards. The Sparkfun RedBoard is plugged in and the Seeed Seeeduino v4.2 is beside it. My USB-C MacBook is connected to the RedBoard via a StarTech USBC hub. (model Dkt30chvscpd is both Mac and Windows compatible)
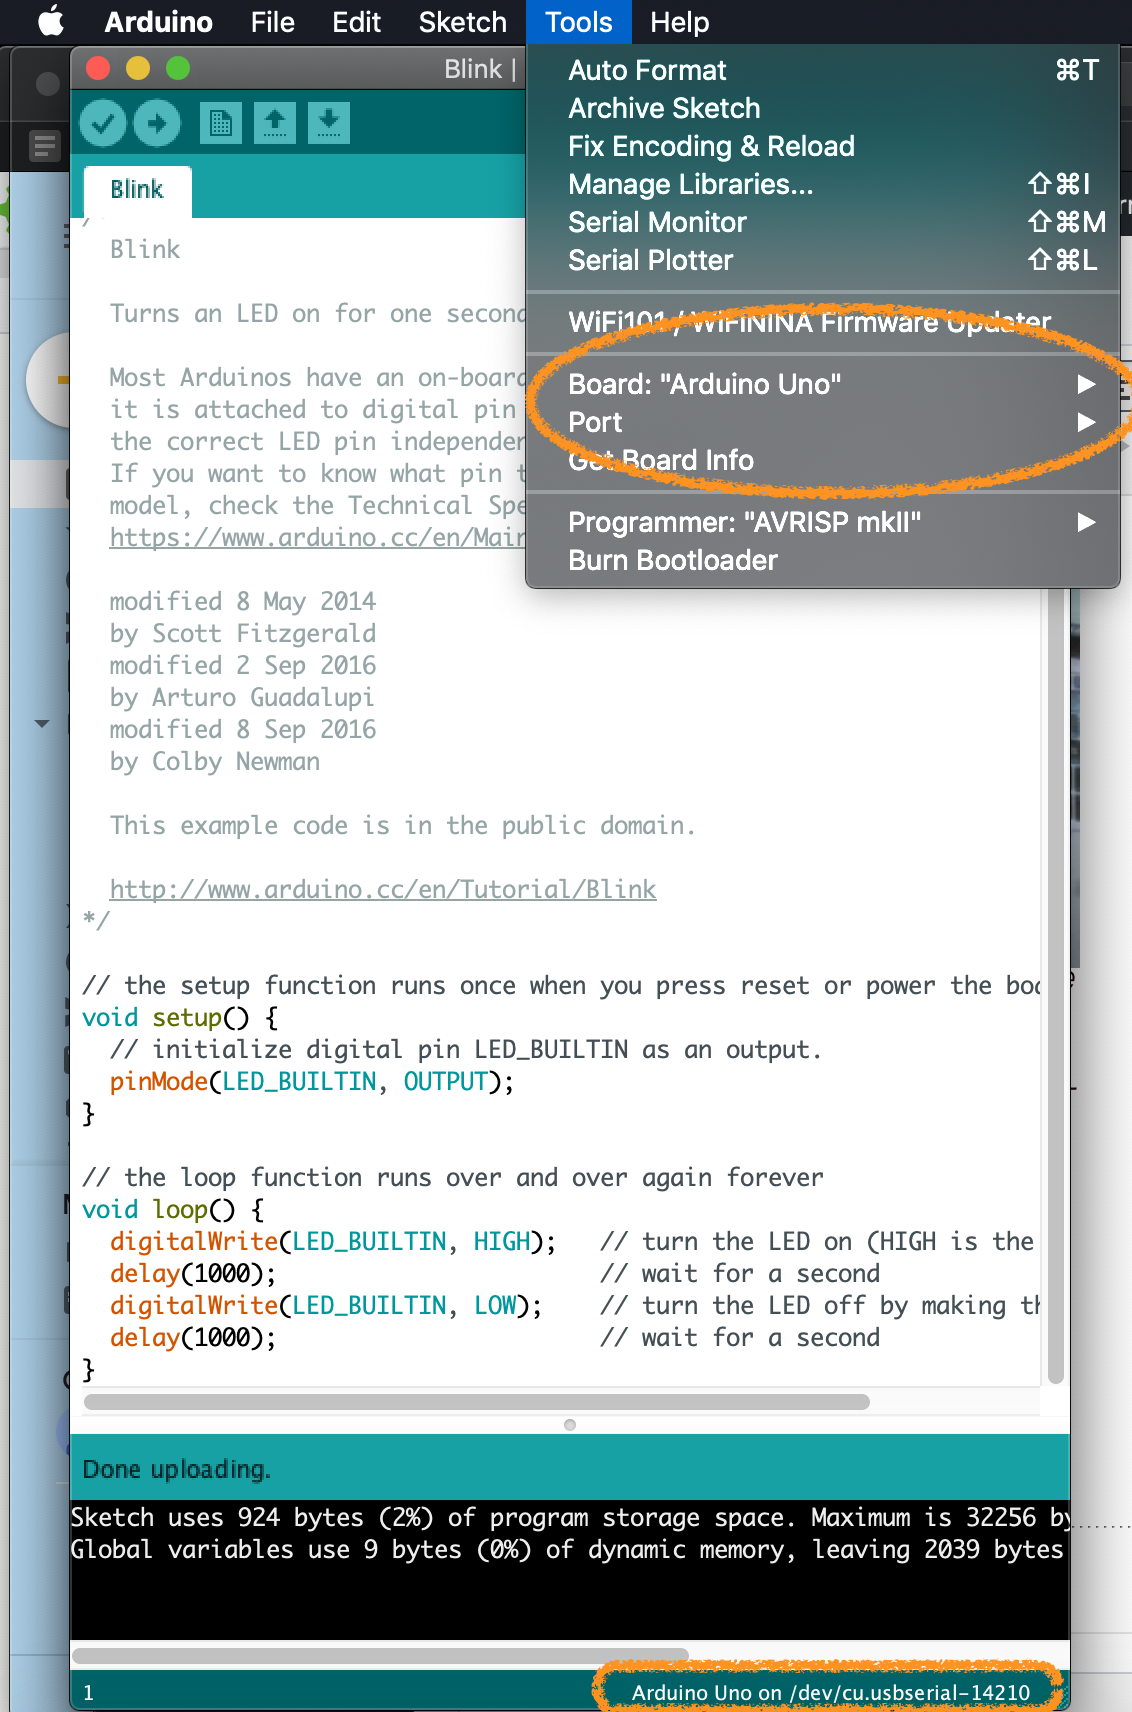
Use the Arduino IDE to see if you can communicate with the board.
- Use the Tools->Board menu to select "Arduino Uno" (whether it's an Uno or one of the compatible boards like the RedBoard or Seeeduino.)
- Then, use the Tools->Port menu to find an option that looks like *** blah blah blah*** usbserial***blah blah bah*** (on a Mac)... it might be different on Windows. You can alternate between checking this menu, unplugging your Arduino Board, checking the menu again, to see what changes.
- When I plug my board through my USB-C hub, the serial connection is called /dev/cu.usbserial-14210. Another time it came up as /dev/tty.usbmodem1423401. My Grove Beginner Kit came up as /dev/tty.SLAB_USBtoUART.
- When I plug my board through a USB-C to USB-B adapter it's called /dev/cu.usbserial-1410. Another time it came up as /dev/tty.usbmodem14101
What serial port is the board connected to? You can use the Arduino IDE to help you figure that out.
Let's try a different approach. Let's get the Arduino set up using the arduinosetup wizard. Type in the following into the Matlab command window.
>> arduinosetup
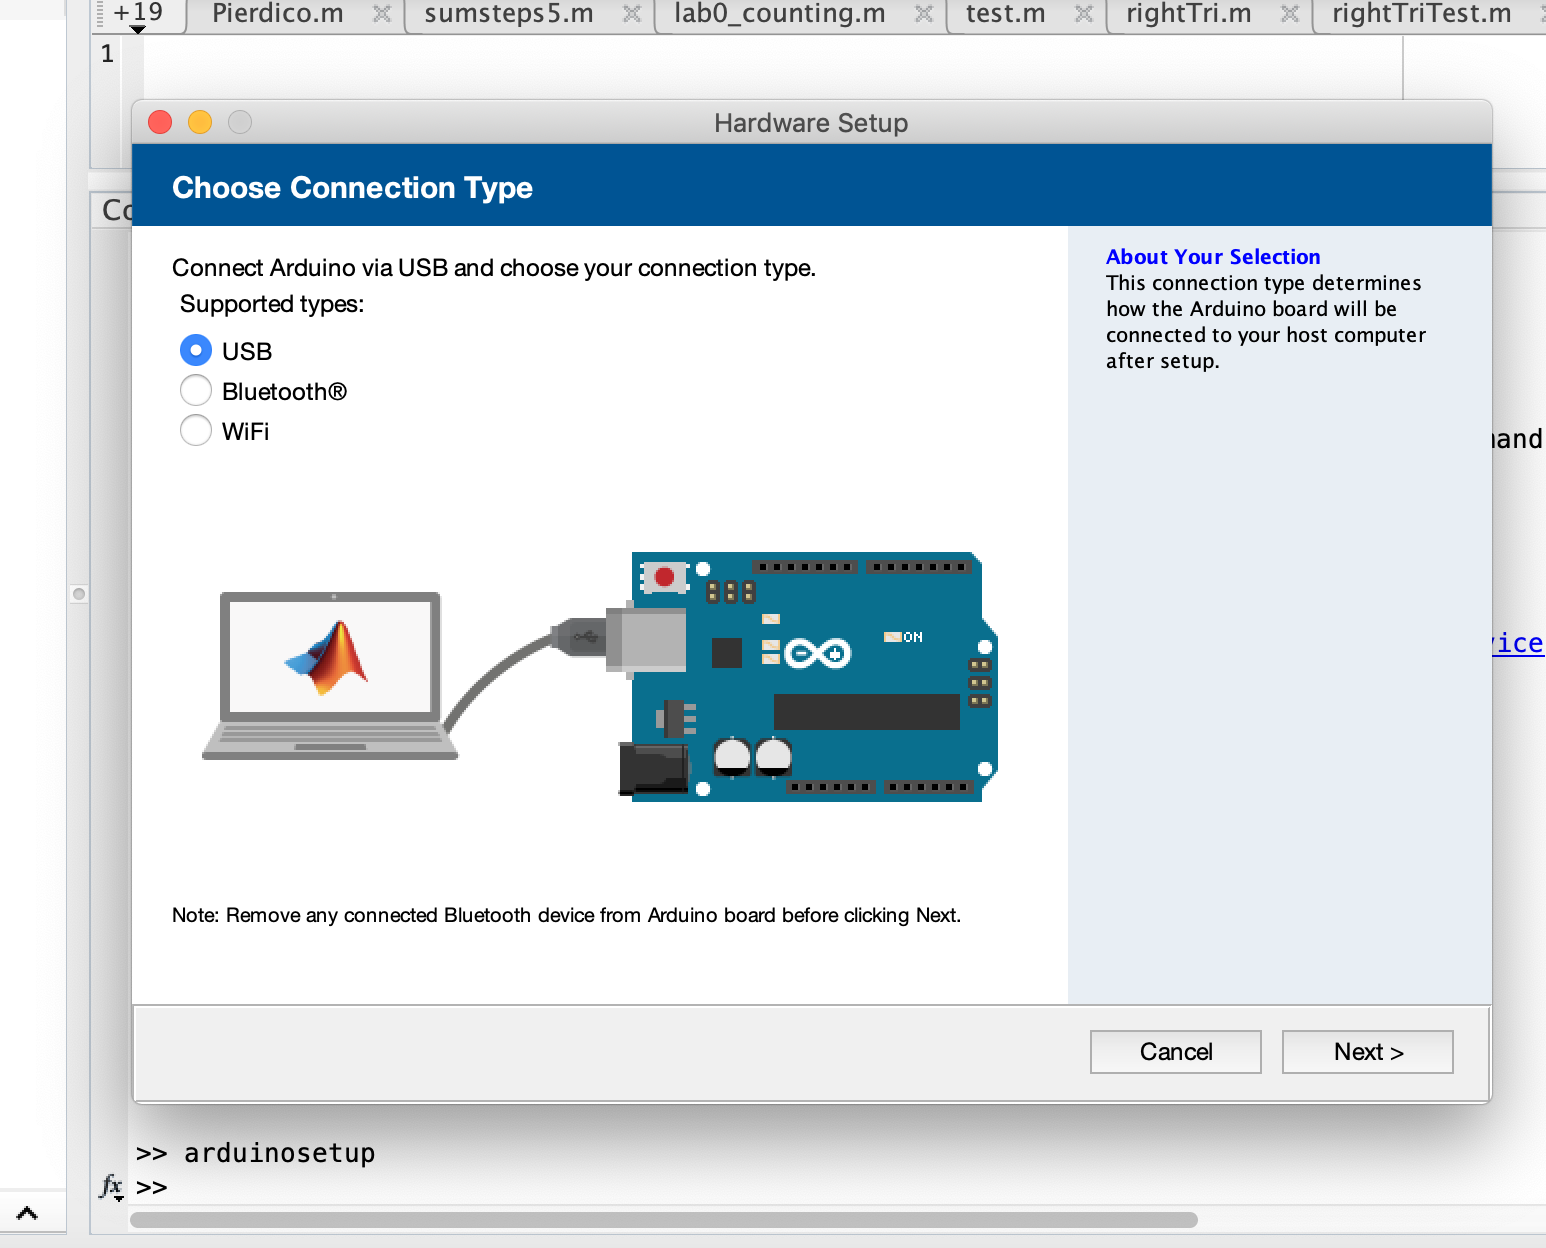
Arduino setup on Matlab pops up a new window.
Click on USB, then next. Choose UNO and then try to select a port. In my case, it can't find it.
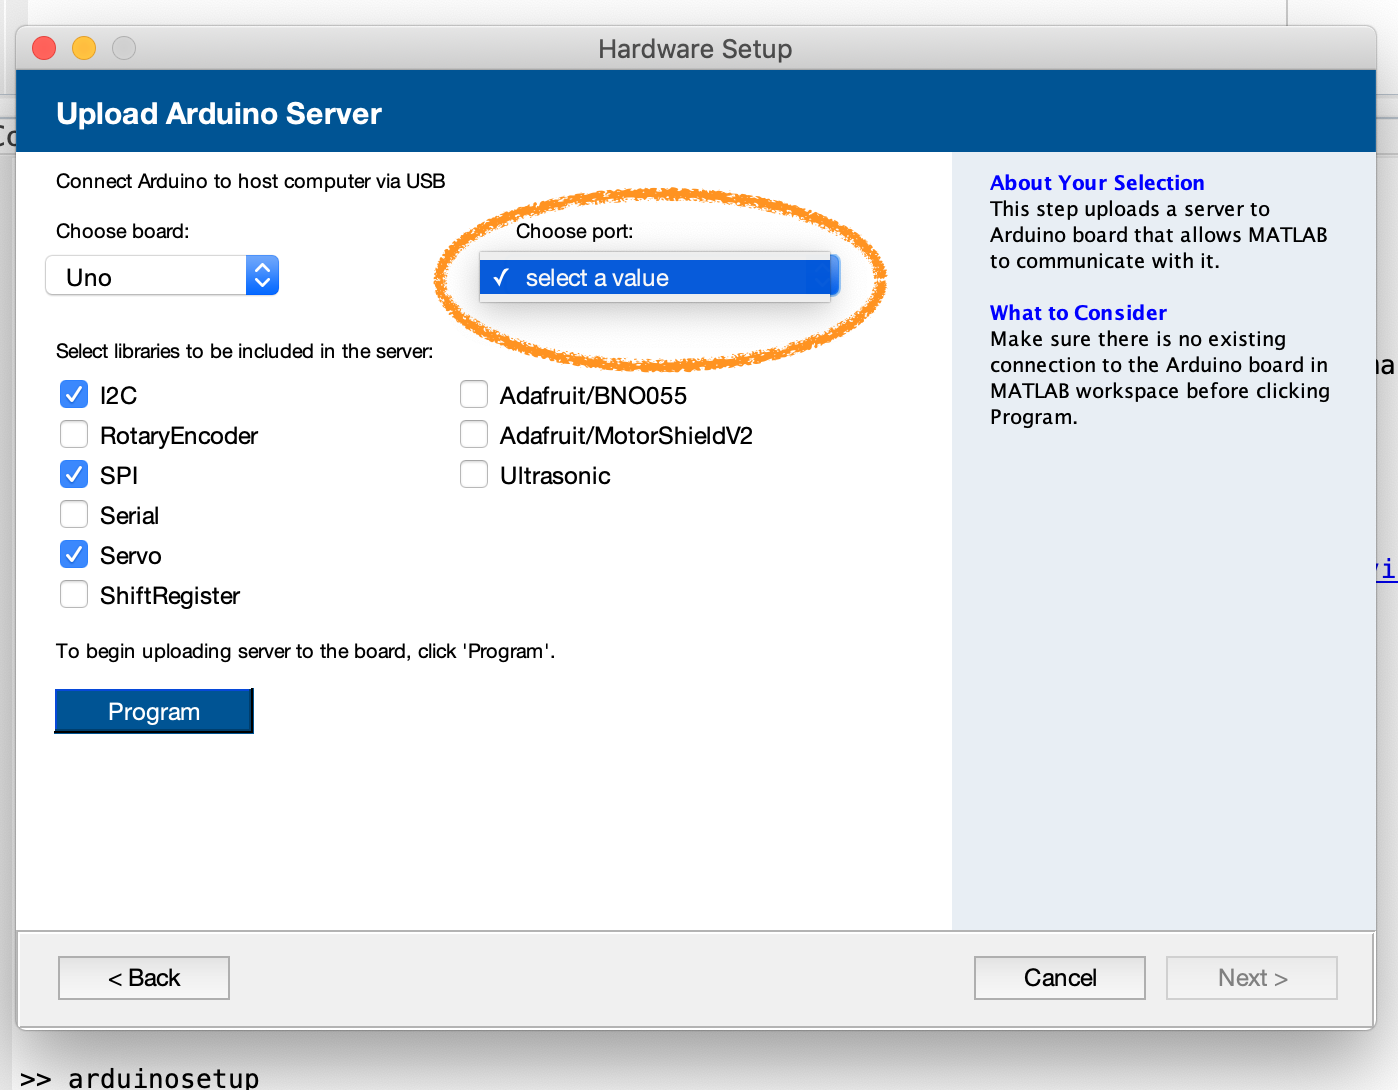
Matlab arduino setup can't find the Arduino Uno compatible board connected to my Mac.
I go to my terminal on my Mac and check the devices using ls in the /dev folder:
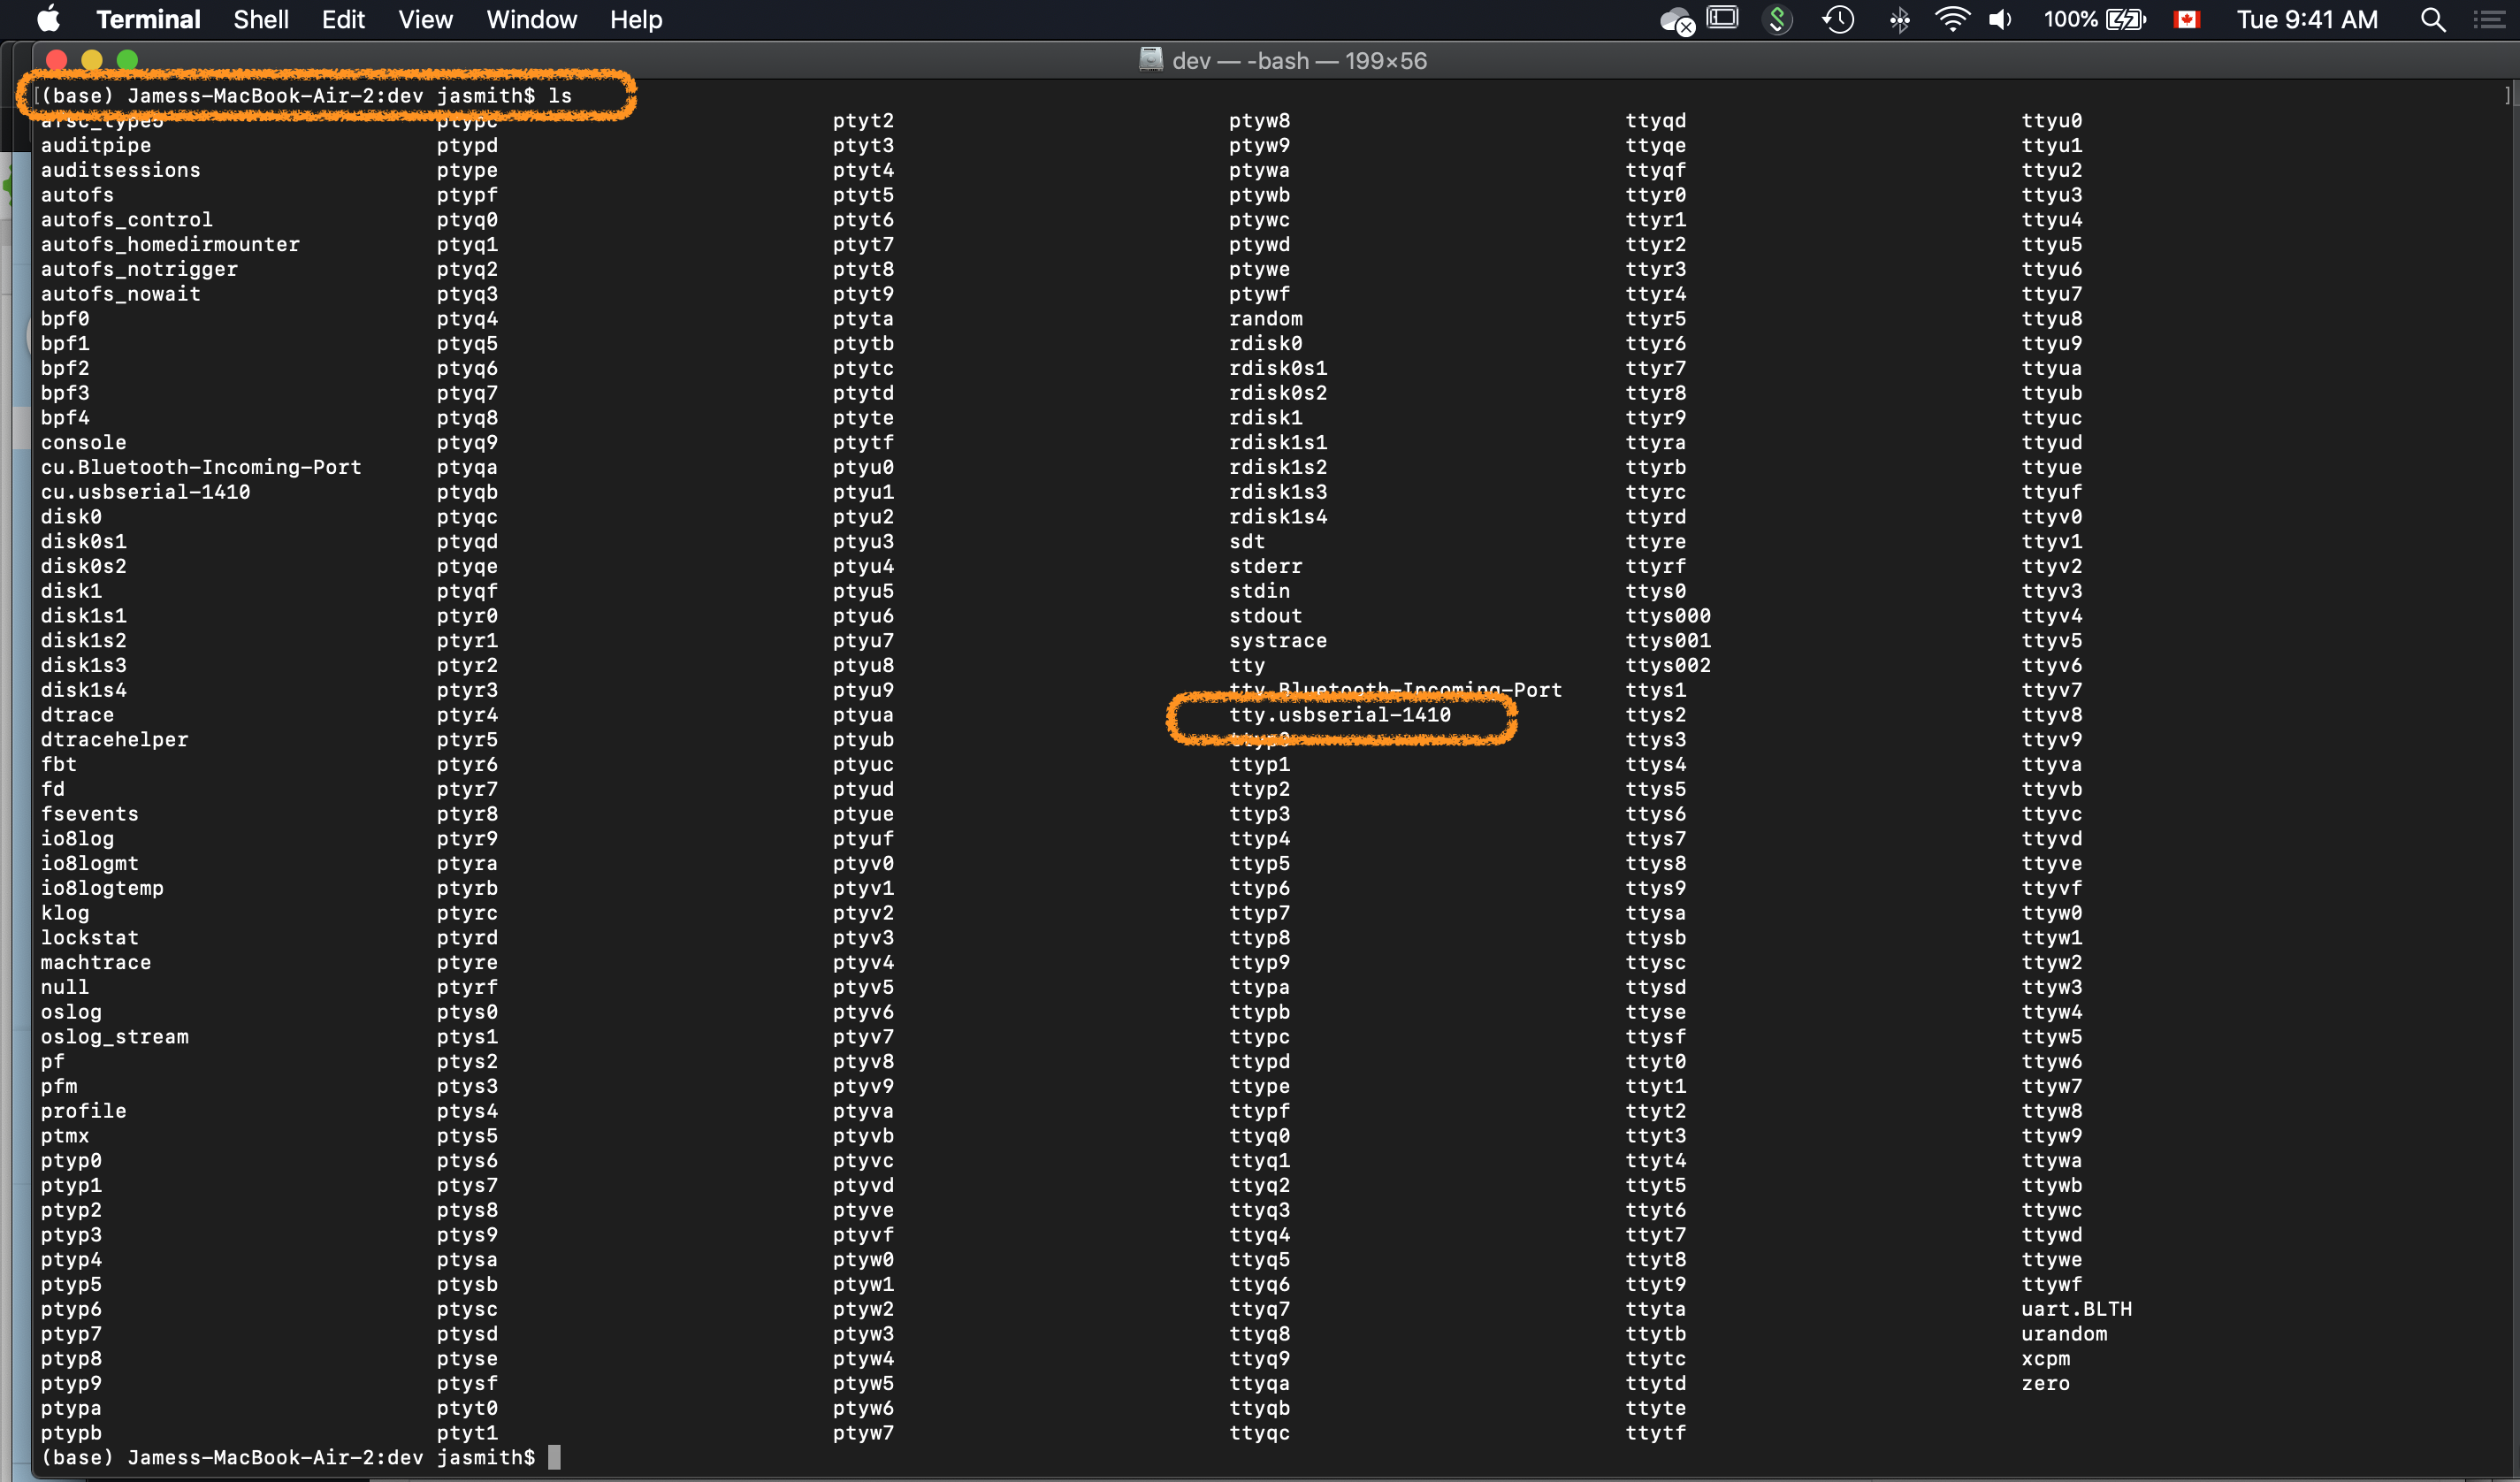
My Mac (MacBook Air 2018, MacOS 10.14.6) sees the Arduino device on the USB-C port, connected via a straight-through HP USB-C to USB-B adapter.
it's there. So why can't Matlab see it? Because I didn't specify the type of board ("uno"). Try again:
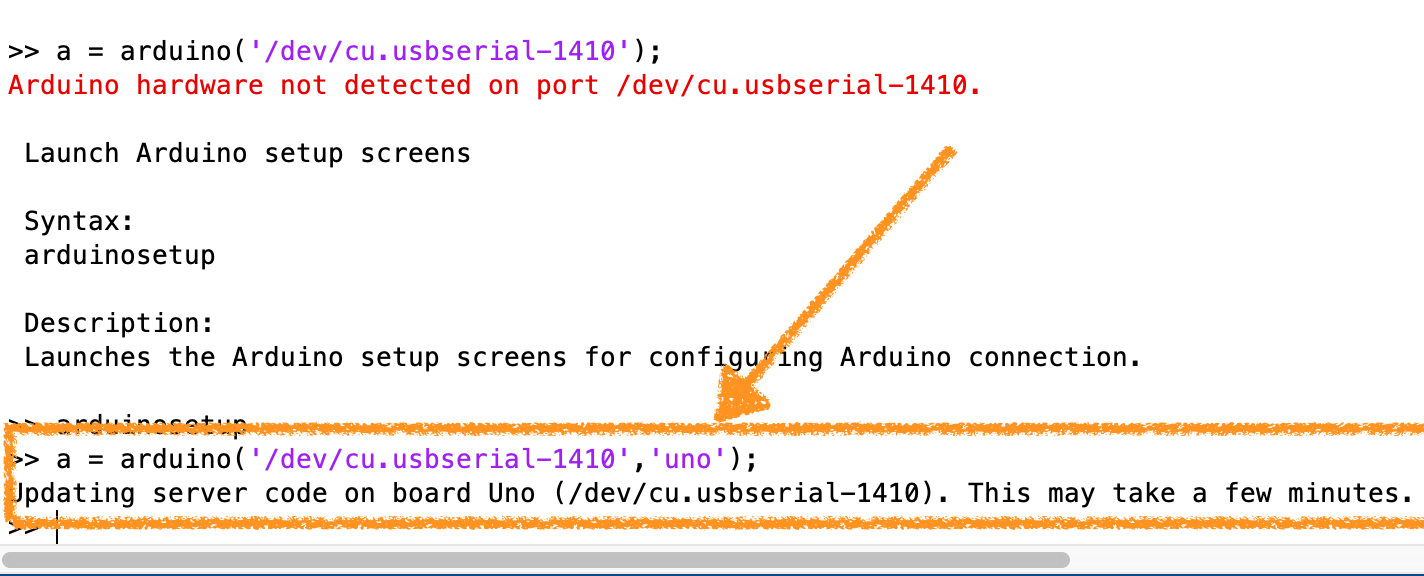
Connect to the board, but make sure to specify both the port and the board type. Matlab will launch the Arduino IDE to "reflash" the board to put a server on it.
Excellent. Now, let's see what kind of object has been generated by Matlab that we can then use to access the board.
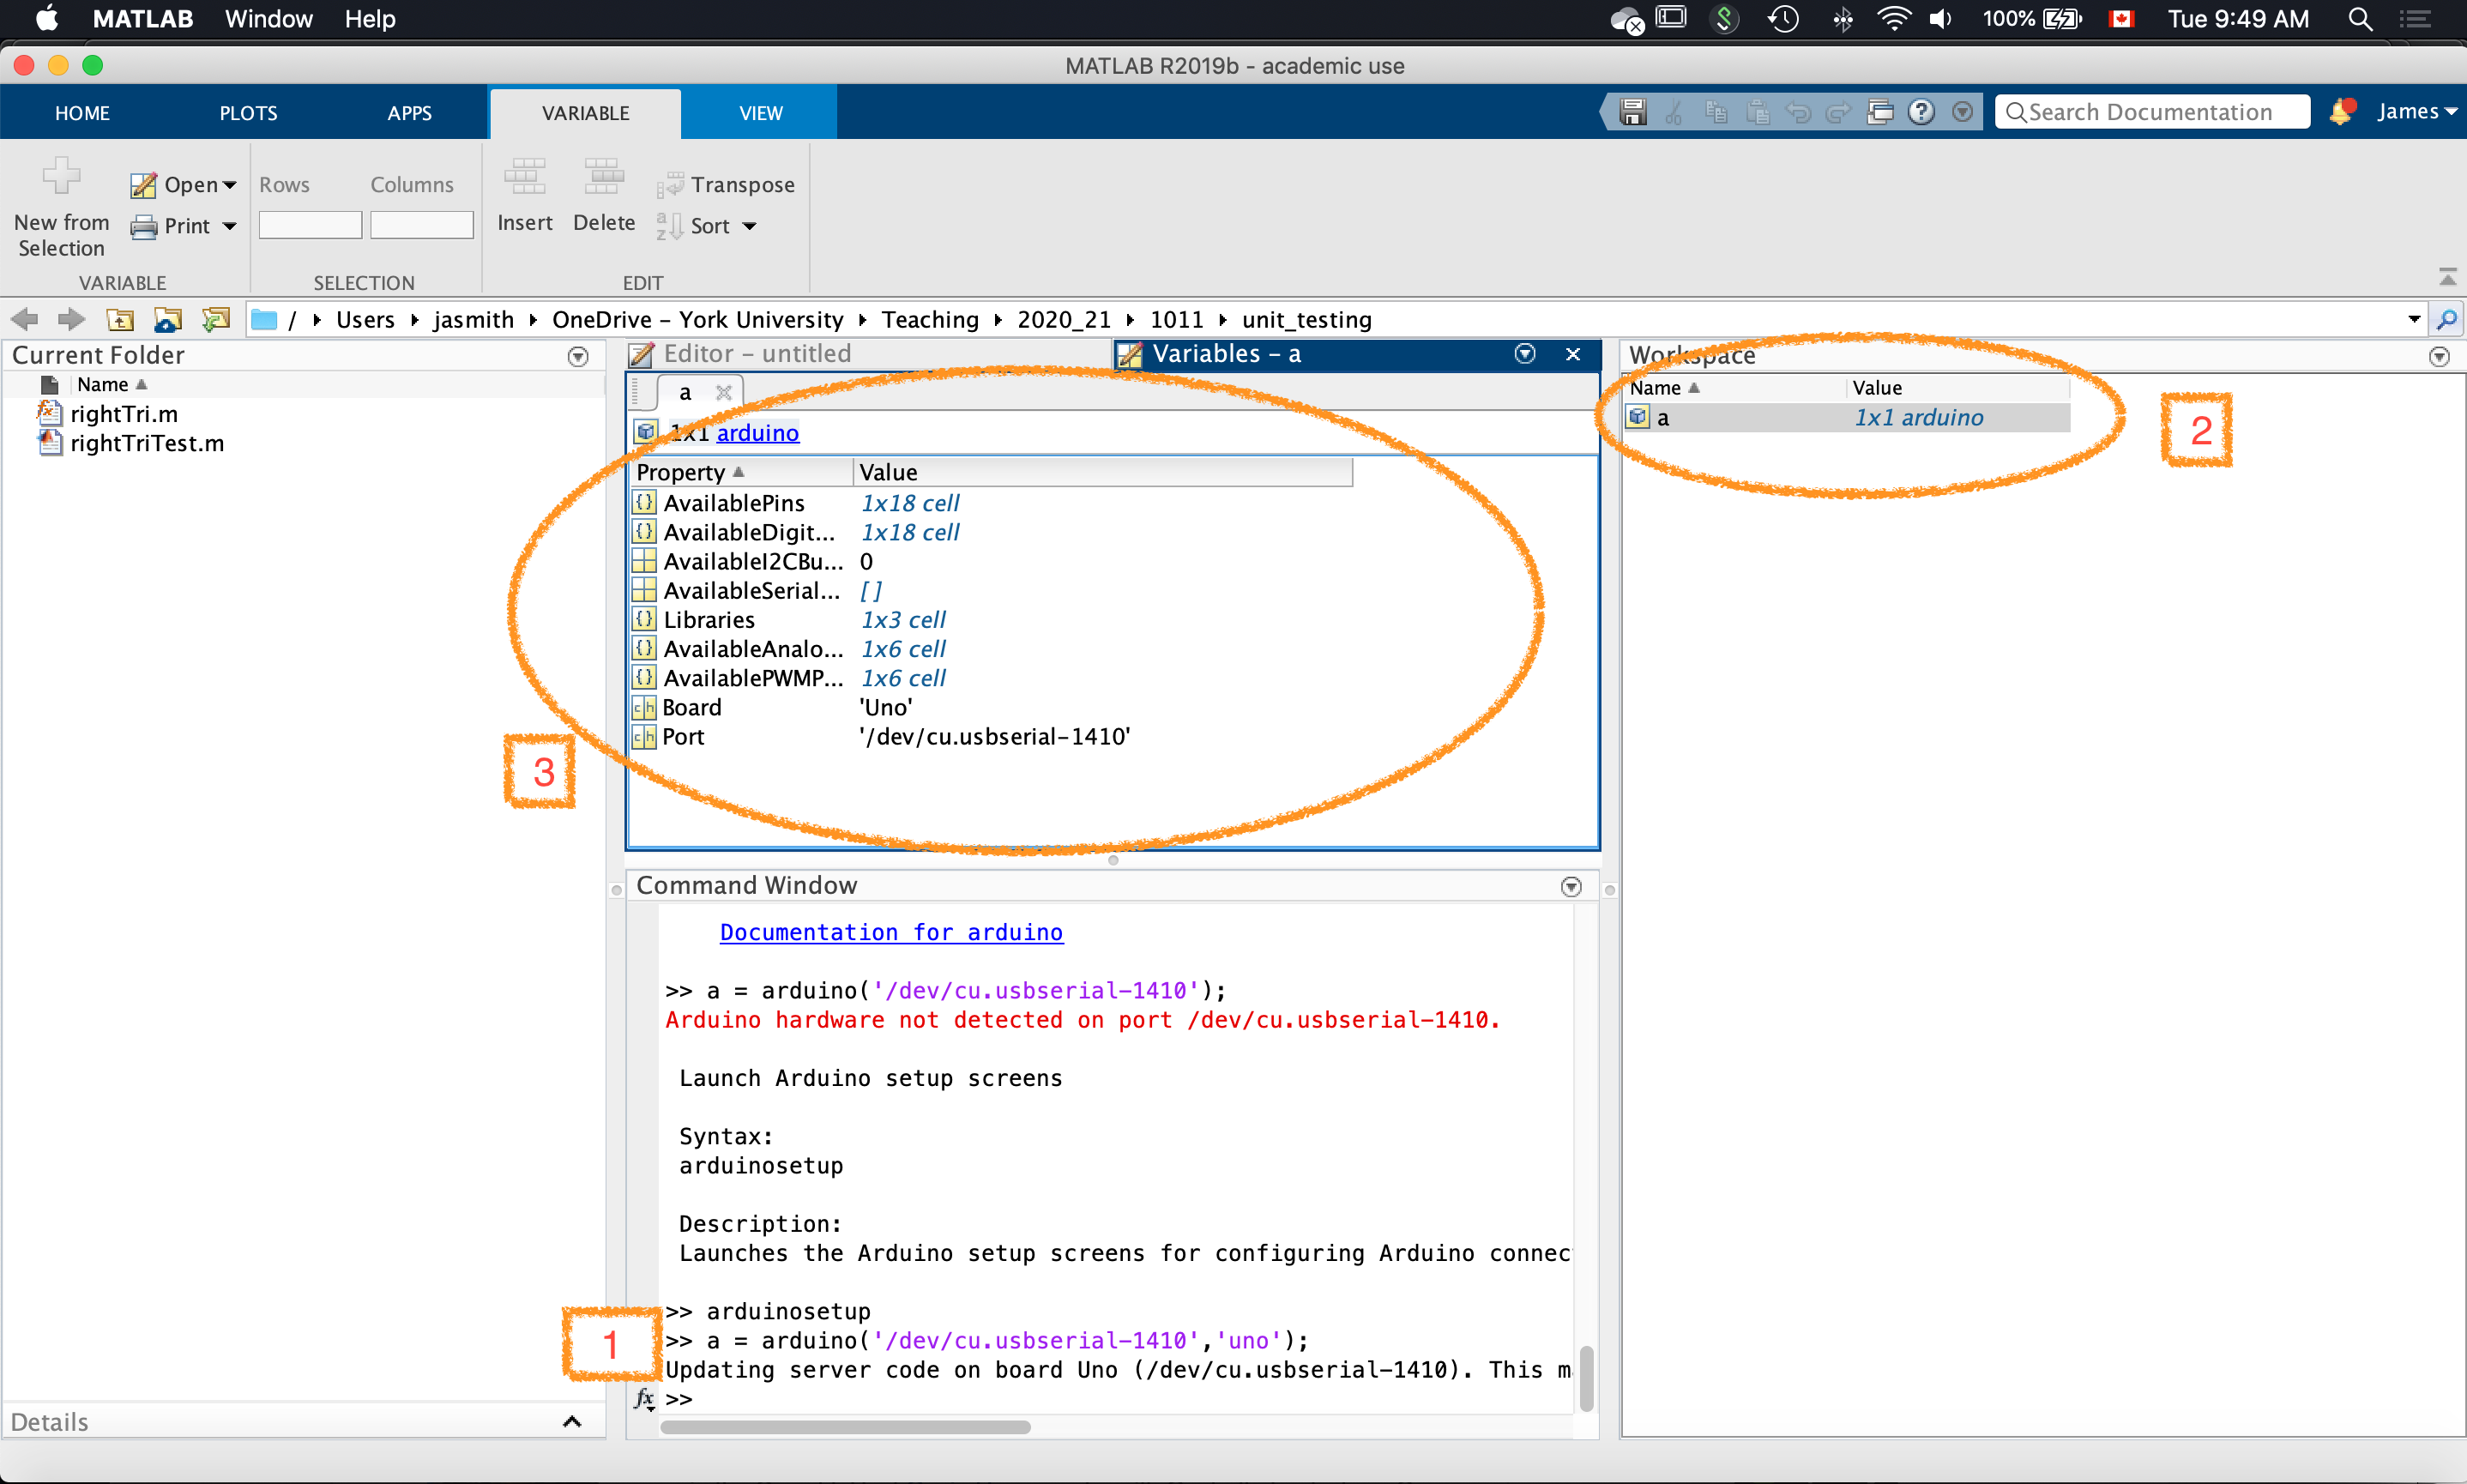
Matlab creates an object that allows us to access the Arduino Uno via the server that it has installed on the board.
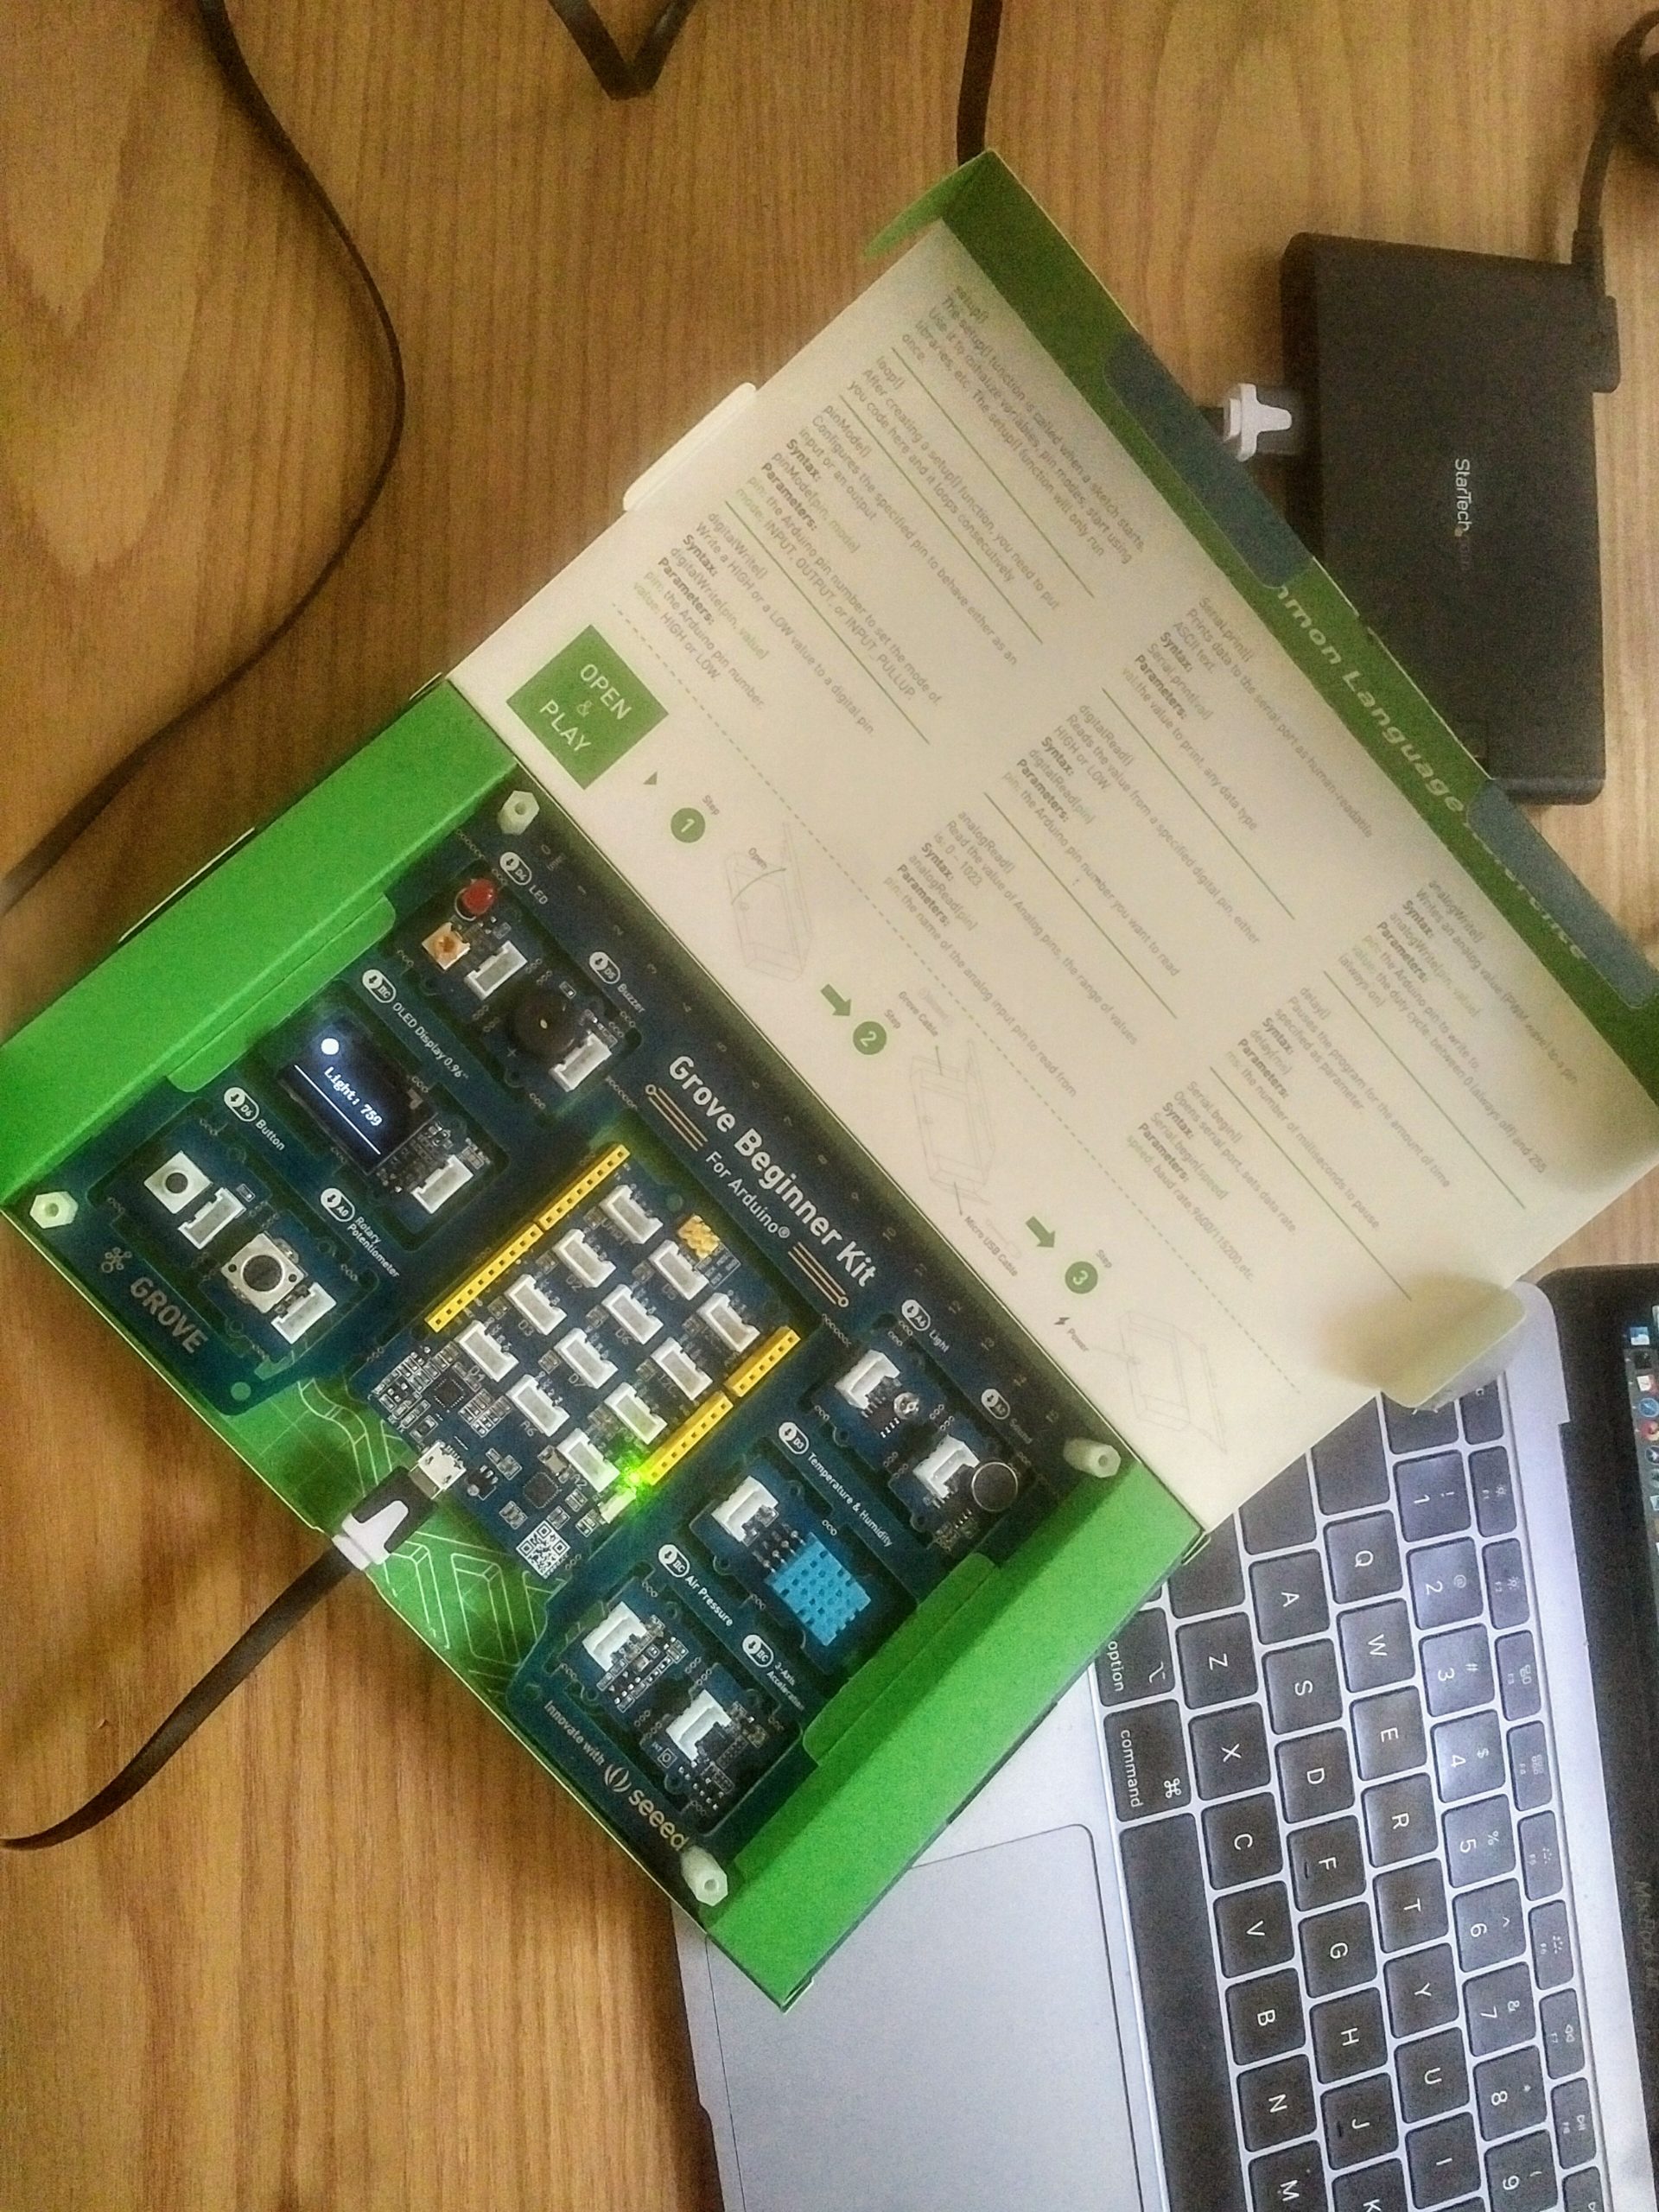
Now, let's try the Grove beginner kit. [Grove Beginner Kit manual (PDF; and backup at archive.org.)]
Yes. It works. When you power it up for the first time you'll see the OLED screen give "light" values. Find out what port it's connected to and then have Matlab reflash it. When it's refreshing you'll see LEDs to the left of the USB port (labelled RX and TX... they're green and red) flash a lot. That's the reflashing data being transmitted to the chip on board.
The Grove Beginner Kit includes an Arduino-compatible board. I set it up with a = arduino('/dev/tty.SLAB_USBtoUART','uno'); after I identified the USB port name that it connected to.
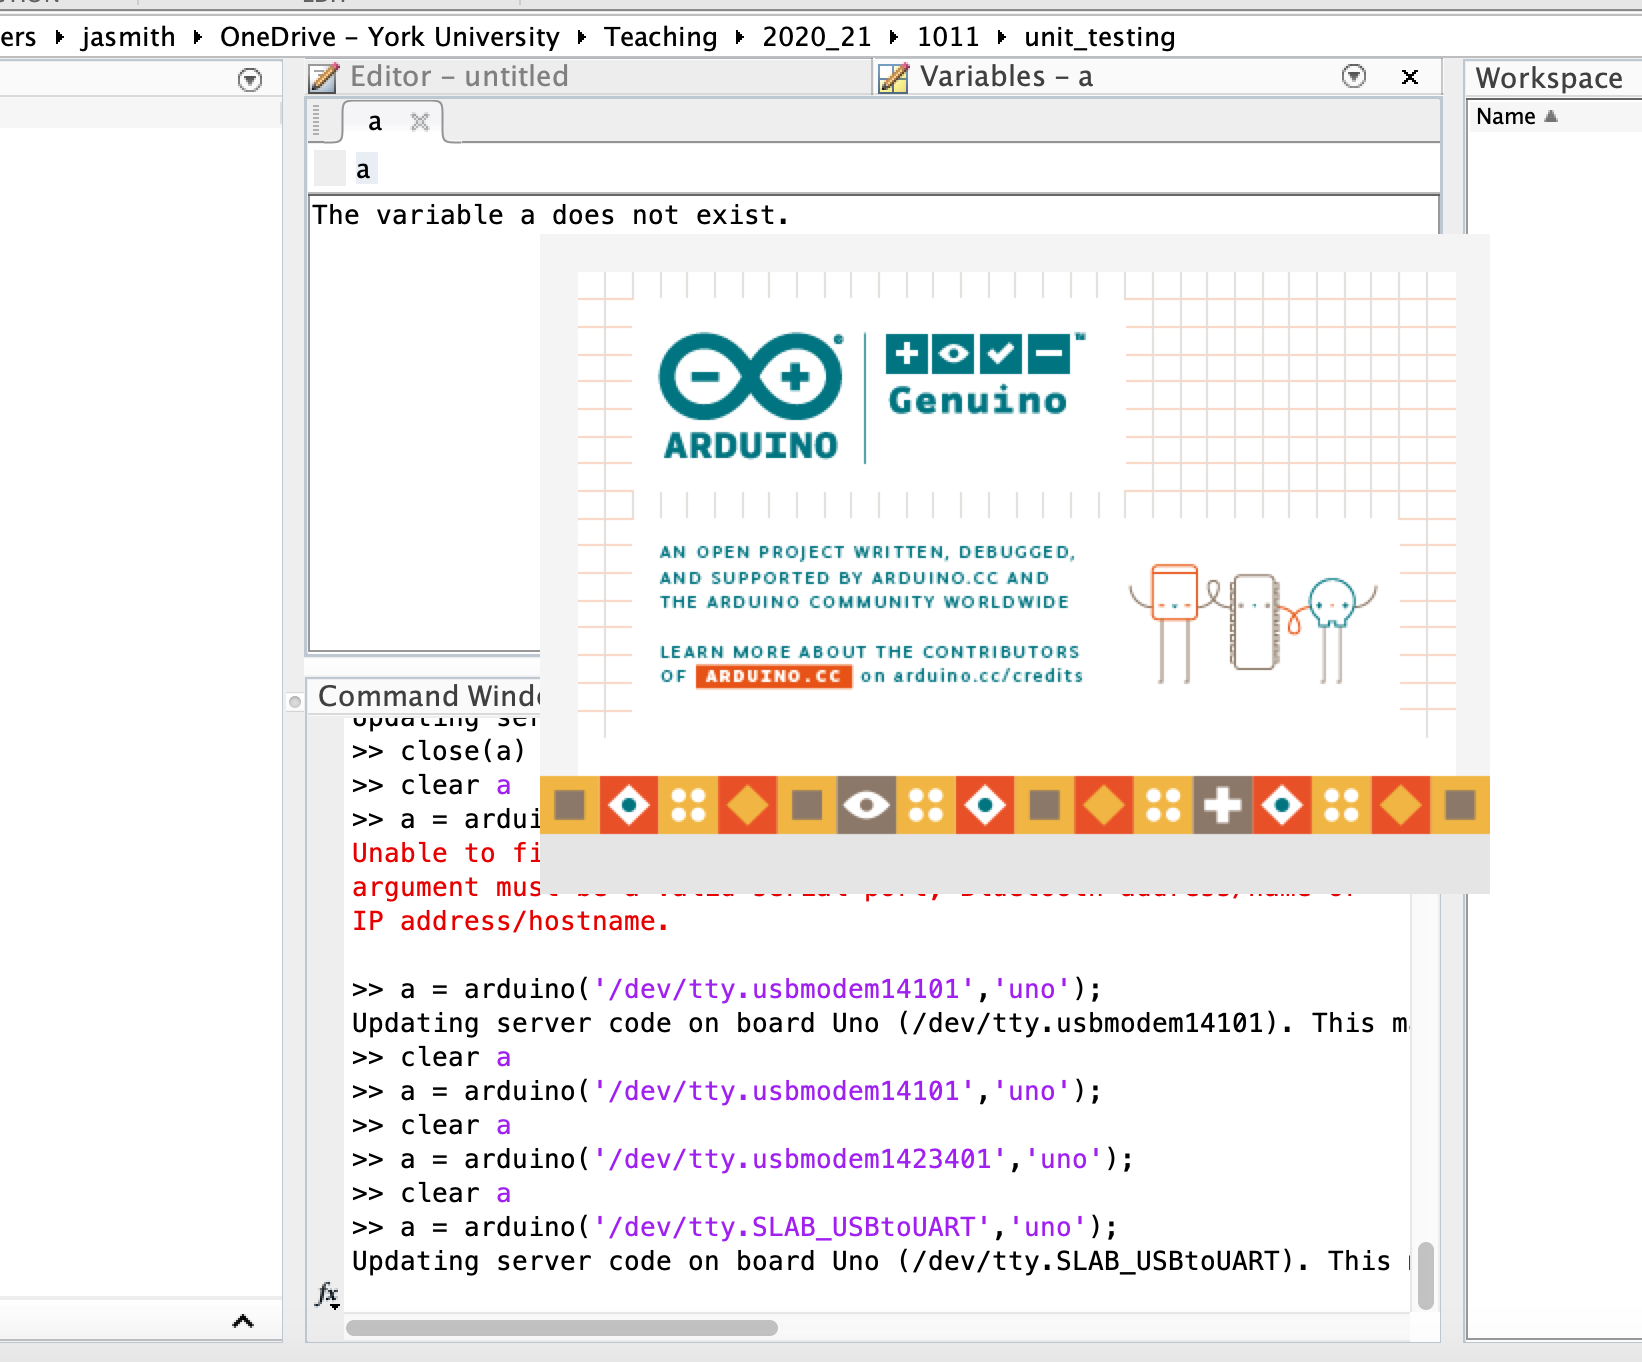
matlab will reflash the Grove Beginner Kit's ATMEGA328P chip. It's the same microcontroller as the one on the popular Arduino Uno.
a few tests with the peripherals on the Grove Beginner Kit:
For the potentiometer... we can get a voltage measurement...
voltage = readVoltage(a, 'A0')
We can turn the LED on and off with
writeDigitalPin(a, 'D4', 1);
pause(2);
writeDigitalPin(a, 'D4', 0);
... only the OLED, Air Pressure and 3-Axis acceleration sensors are I2C, so not accessible at the moment. More about the kit and the sensors here: Grove Beginner's Kit page on Seeed's Wiki. (back-up on Archive.org)
Now, unless you break off some of the existing sensors or actuators you can't use the Grove ports on the central board. So, I connected an analogue sensor to input A1 via the headers and a Grove-4 Jumper to Grove 4 pin conversion cable (Seeed Studio p/n BH2002270004 or 110990210). Yellow wire to A1, Black to GND and Red to 5v.
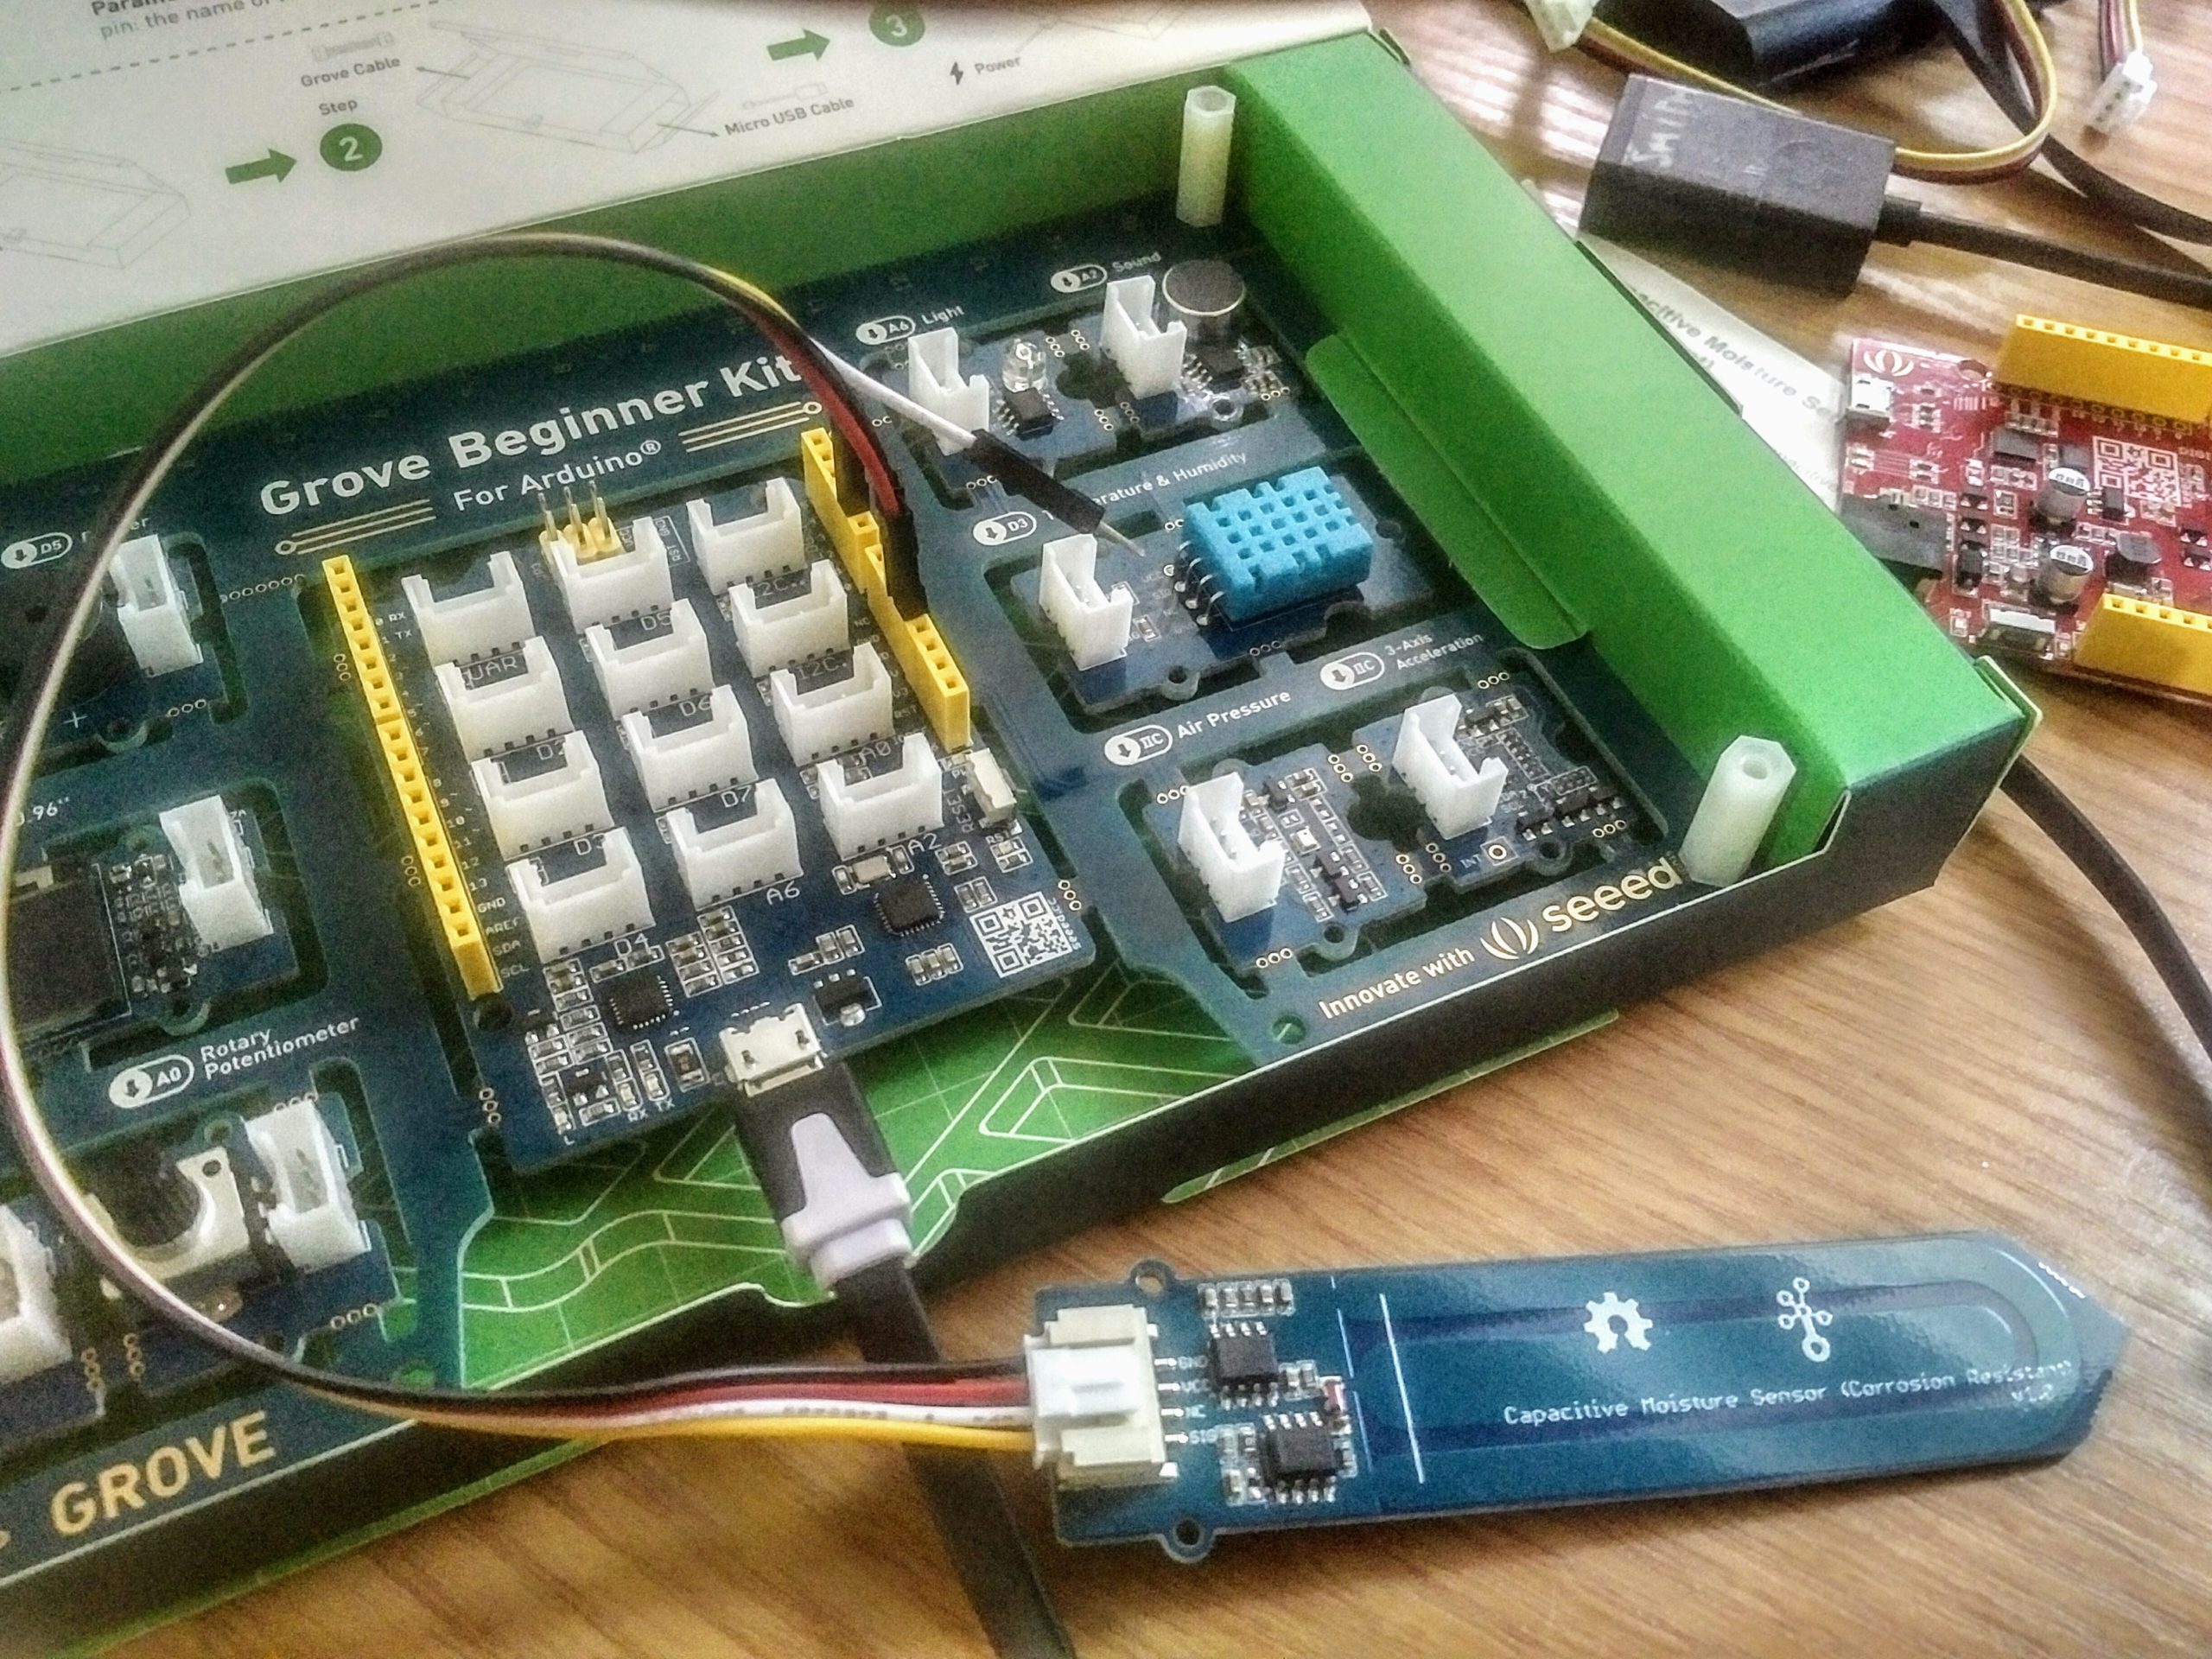
Capacitive sensor attached via header.
So, the breakout cables work. Need extensions for them, though. [** to do **]
Live plots of data is going to be important. See this Mathworks post on Arduino graphing. (backup on Archive.org)
Sources:
- https://www.mathworks.com/help/supportpkg/arduinoio/ug/getting-started-with-matlab-support-package-for-arduino-hardware.html
- https://highvoltages.co/tutorial/arduino-tutorial/arduino-real-time-plotting-with-matlab/
- Grove Beginner Kit manual (PDF; and backup at archive.org.)
James Andrew Smith is an associate professor in Electrical Engineering and Computer Science Department in York University's Lassonde School. He lives in Toronto, Canada. While on sabbatical in 2018-19 with his wife and kids he lived in Strasbourg, France and taught at the INSA Strasbourg and Hochschule Karlsruhe and wrote about his personal and professional perspectives. You can find him on Twitter.