The following is a description of how I installed JavaFX SDK version 11 on Java SDK 14 with the IntelliJ IDE.
Download the SDK and Link to IntelliJ
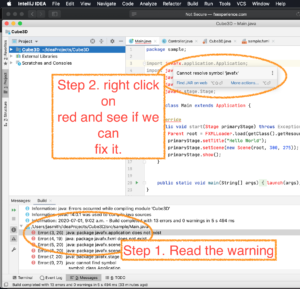
The JavaFX toolkit (SDK) is an add-on for Java that makes it possible to create graphics. It used to be included with the main Java SDK, but if you're using Java 11 and above you need to download and install it separately. If you haven't done so and try to compile a JavaFX solution in IntelliJ then you'll get a screen that looks like this:
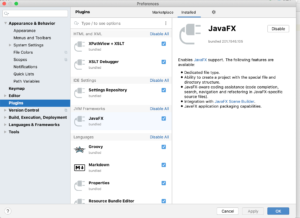
Nuts. IntelliJ can't create a JavaFX project. Why? Probably because I didn't install the JavaFX package. IntelliJ tells me that I have JavaFX "bundled"... when I check out the IntelliJ -> Preferences -> Plugins... it's there:
But the JavaFX library is not actually installed. I don't understand the difference between something being "bundled" and "installed"... but ... oh... gotta follow the instructions.... and just download and locate the darn thing from https://openjfx.io.
So, I've now downloaded, saved and decompressed the JavaFX toolkit. While version 14 of JavaFX is available (June 2020), I installed version 11 of the JavaFX toolkit (SDK) and I'm running version 14 of Java.
So I downloaded JavaFX 11 and placed it in my Documents folder. Now I needed to tell IntelliJ where I placed it on my home computer... but I can't figure out how to make the text-based tutorial work for me... so...
Thank goodness for YouTube tutorials!
I tried following the text-based instructions by JetBrains and it didn't work. So, I turned to YouTube and found two ways. First as a standard installation and, second, as a "Maven" online install. Let's start with the first one:
Standard Install
I'm assuming that you've already downloaded JavaFX Version 11 for your computer from OpenJavaFX. Make sure it's been decompressed in a dedicated folder (not your "downloads" folder... maybe in "Documents/javafx" or something like that). In my case, on a Mac:
- it's /Users/jasmith/Documents/java/java-sdk-11.0.2/
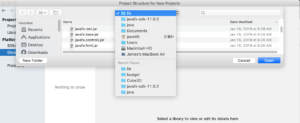
You'll be setting the JavaFX lib folder within Global Libraries option in IntelliJ. The location is where you saved and expanded it. Me? I put in my Documents folder.
- Open IntelliJ.
- Choose Configure from the splash screen.
- Structures for New Projects (or Project Defaults -> Project Structure)
- Global Libraries -> + -> Java -> ... find the JavaFX library folder (e.g. /Users/jasmith/Documents/java/java-sdk-11.0.2/lib) ... and then Open & OK.
- name it javafx11
- Create a new project from the splash screen
- choose JavaFX style project and select your Java SDK flavour (mine is Java 14, while my JavaFX is 11)
- Name your project (just alphabet letters... I called mine javaFXproject)
- Within the project, go to File -> Project Structure -> Global Libraries
- Choose the JavaFX11 word in the middle column, under the + and - symbols.
- Right click on it. Click on Add to Modules.
- Confirm ("OK") that you want it to apply to the modules in this project (the default)
- select only the .jar files in the lib folder... don't select the lib folder or the zip files or other files in that folder.
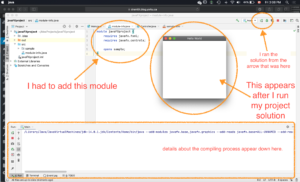
- in the project window, src ... right click and create a new module. A new tab opens.
- Now that you have the module tab, write (create)module javaFXproject {
requires javafx.fxml;
requires javafx.controls;opens sample;
}inside that module tab.
- Now that you have the module tab, write (create)module javaFXproject {
- Now run by finding the green arrow in the top right portion of your screen.
Make JavaFX Modularn with Maven
I'm using this Youtube video (Oct 2019 version); OpenJFX site (https://openjfx.io/openjfx-docs/; choose JavaFX and IntelliJ and Modular with Maven.)
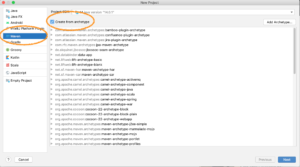
- Start with the IntelliJ splash screen and choose a Maven project, and ...
- Check "create from Archetype"
- Click on the "Add Archetype" button
- Group ID: openJFX.org ; Artifact ID: javafx-maven-archetypes; Version: 0.0.1; Repository: [don't put anything here]
- Click on Next/OK and the archetype will install
- The JavaFX Maven Archetype should now be highlighted in the window. Click on Next.
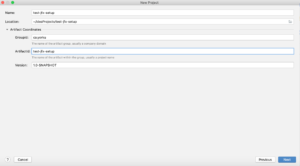
- click on the little triangle for "artifact coordinates" so that you can set GroupID and ArtifactID for this project. Set GroupID to ca.yorku because your working on a project for class and make up some project name for the ArtifactID like test-jfx-setup. Then click on Next.
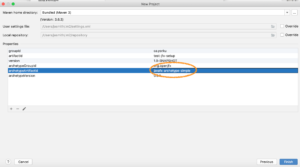
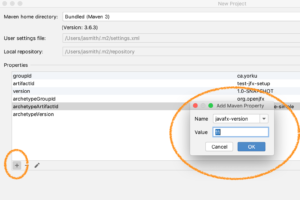
- In the next window, set archetype artifactID to javafx-archetype-simple and set the JavaFX version. I'm using JavaFX 11, so I would enter 11. Then click on Finish.
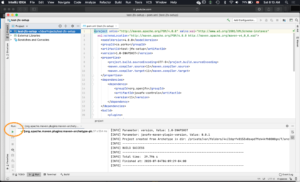
- Now wait for IntelliJ to finish downloading and setting up.
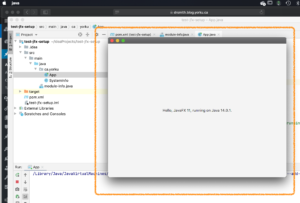
- Try to run the project by finding the green arrow.
- The project will likely fail to run.
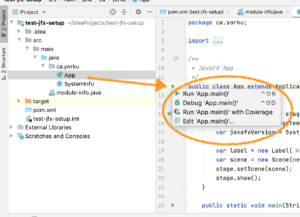
- That's because you have to open the App class (in the project window on the left, and get down to the src section)
- Click on the green arrow that appears beside the App class solution.
- then click on the "Run App.main()"
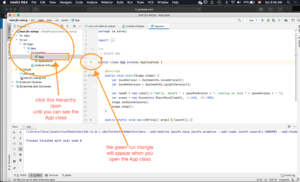
This is how you run it. Open the App class and use the triangle that appears beside the App class solution.
Alternatives
James Andrew Smith is an associate professor in Electrical Engineering and Computer Science Department in York University's Lassonde School. He lives in Toronto, Canada. While on sabbatical in 2018-19 with his wife and kids he lived in Strasbourg, France and taught at the INSA Strasbourg and Hochschule Karlsruhe and wrote about his personal and professional perspectives. He's on Twitter a lot.

