As of MPLAB X 5 (v 5.05 and XC8 v2 compiler tested) you can develop projects for 8 bit MCUs like the PIC16, PIC18 and 8 bit AVR ATMEGAs. You can even reprogram your Arduino UNO board using the new Microchip PICKit 4!
Here I'm going to have a look at using at the Assembler examples in the classic "Easy PIC'n" book and on Chuck McManis' website. While I normally use PIC32s I've been asked to help out with an Assembler-only course using the PIC16f84a at the INSA in Strasbourg, France. It's good to get out of my comfort zone during my sabbatical from York University! That's the point of the sabbatical, isn't it?
Here are the steps:
- New Project
- Microchip Embedded -> Standalone Project (next)
- Family: Mid-Range 8bit MCUs ; Device: PIC16F84A (next)
- Hardware Tools: Simulator (next)
- Compiler: mpasm (the assembler; version 5.81 in my case) (next)
- Project name and folder: name the project at the top. (finish)
- Make sure that "set as main project" is checked.
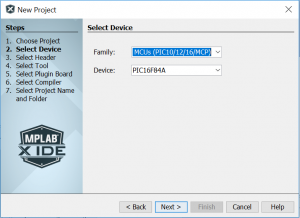
Select the chip (PIC16F84A)
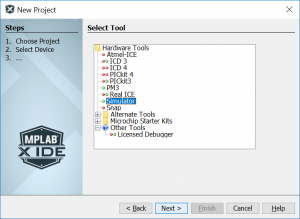
Choose the Simulator option
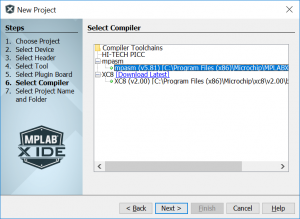
Choose the mpasm assembler.
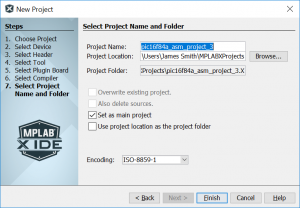
Choose a project name. Me? I chose pic16f84a_asm_project_3
Now, you're faced with the main project window. On the left side is the description of your project.
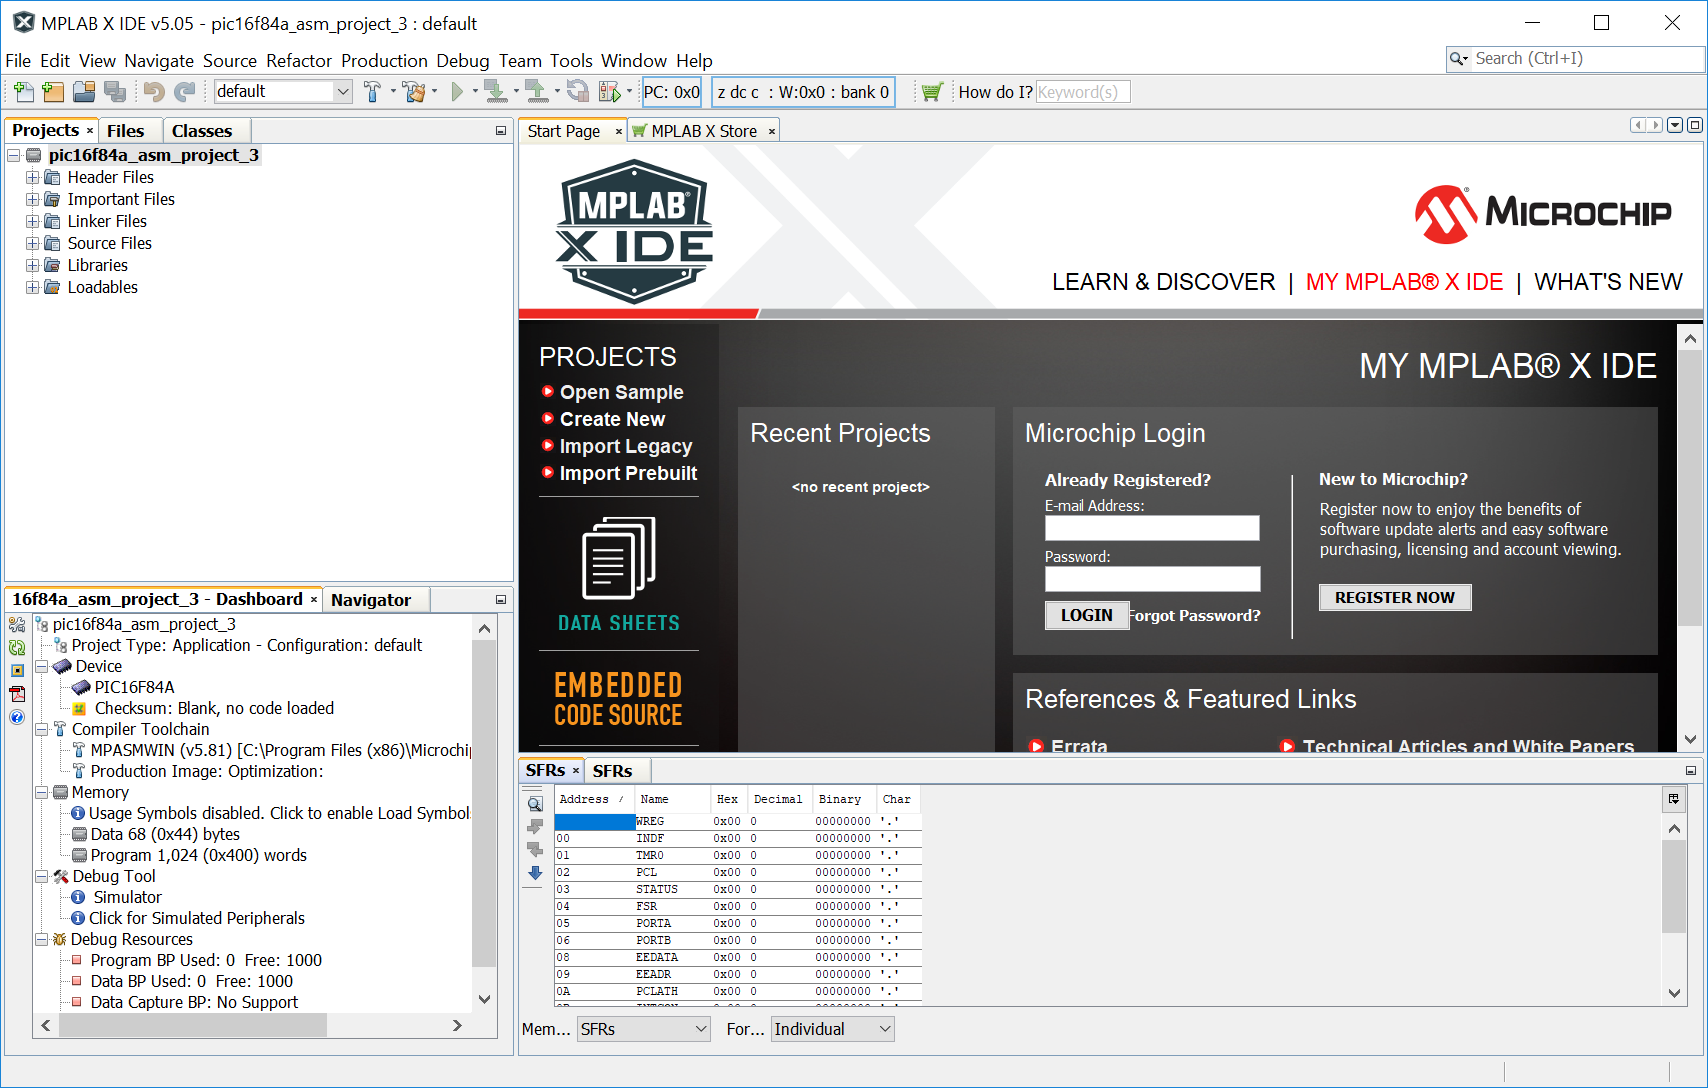
MPLAB X main window, with the PIC16F84A project
Create a source assembler file.
- Right-click on the "Source Files" section of your project files.
- New -> Other -> Assembler -> AssemblyFile.asm (next)
- In the next window, keep defaults (finish)
The blank assembler source file appears in the editor sub-window. You can now fill it with source code from the Easy PIC'n PDF. I'm going to start with the code from PICT1.asm on page 23 of the book.
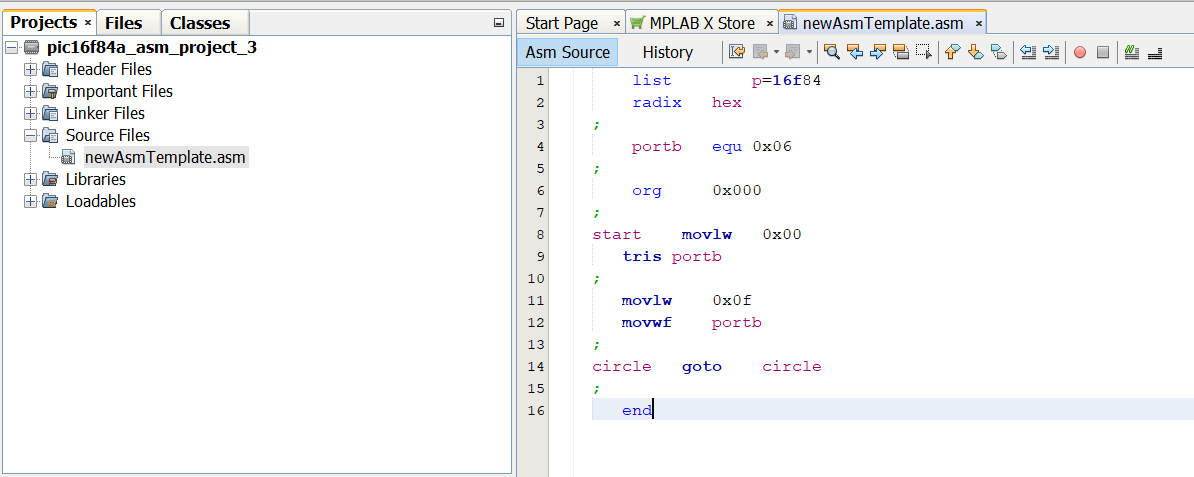
PICT1.asm listing from the Easy PIC'n book.
Click on the Hammer in MPLAB X (or the F11 key on your keyboard) to build the project using the MPASM assembler.
Click on the line number beside the "start" keyword in the assembler listing. This will insert a "breakpoint" that will halt the code when it is simulated.
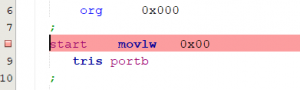
The breakpoint at "start"
Now click on the "Debug" -> "Debug Main Project". The simulator will start executing the code on a make-believe PIC16 inside MPLAB X.
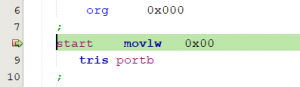
Breakpoint halted execution of the simulator at start.
CLick on Window -> Target Memory Views -> Program Memory. THis will open up a view of the assembler code inside of the memory of your make-believe PIC16. Each time the processor excecutes a new instruction this view will update.
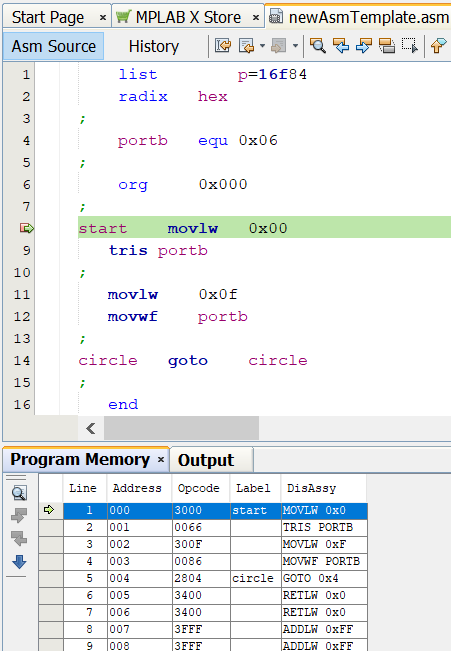
PIC memory view while debugging
Find the "Step Over" button or hit the F8 key to step through the lines in your code. Each time you "step over" the make-believe PIC16 will execute a new line of code. This means that the little green arrow in both the "Program Memory" tab and the code editor window will move to the next line. This means that code is executing.
Now, the Easy PIC'n book was published 20 years before this blog post. That's OLD. Does the example work on a new PIC16? It seems to. The PIC16F1619, found in Microchip's recently-released Curiosity board. At least it does in simulation. I'll have to try it out on the read board another time. The Curiosity board comes with a built-in programmer and is really cheap... about $20 … although I got one for ten bucks, on sale.
Footnote: While many people still use the '84 or '84a, the lack of breakpoints is one reason to move to a different PIC16, like the PIC16F628 (McManis example) or the PIC16F88. Both have the same PDIP-18 pinouts and have the possibility of using breakpoints in-circuit but, unlike the '84, you need to be a bit more careful in setting it up because many of the pins are multiplexed for analogue and come out of reset in analogue mode. Personally, I think that having the breakpoint functionality outweighs the hassle of multiplexing.