
My colleague, Eric Prandovszky, has been discussing the M5Stack system with me for a while and acquired a few modules to us to try out. Today I tried out the M5Stack Core 2 AWS module. My objective is to see if we can program it using the legacy Arduino 1.x IDE on macOS with Apple Silicon chips as they are popular within the university community.
The Arduino instruction page for the M5Stack says that I will require the installation of a specific USB driver. But it's not clear if it's the
- CP2104, or the
- CH9102
variant that is required. Actually, according to the Core2 AWS page it's the CP2104. Yes. It's confirmed in my computer's system report:
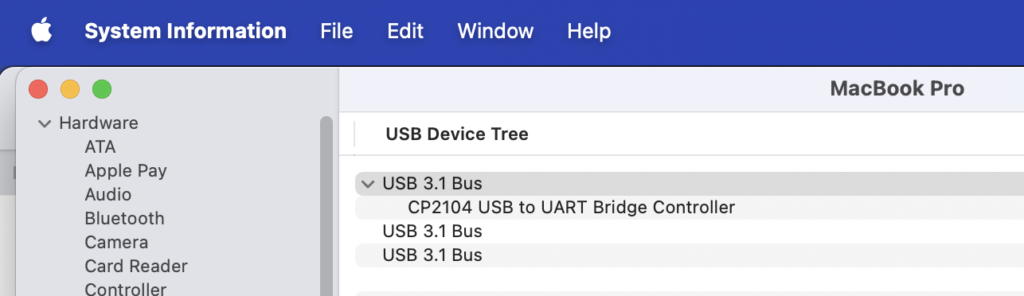
I believe that that driver was either already present on the Mac or it was installed when I installed the driver for the Grove Beginner Kit for Arduino, which apparently uses the same driver. According to the documents for the board we can have both drivers installed, so if in doubt install both.
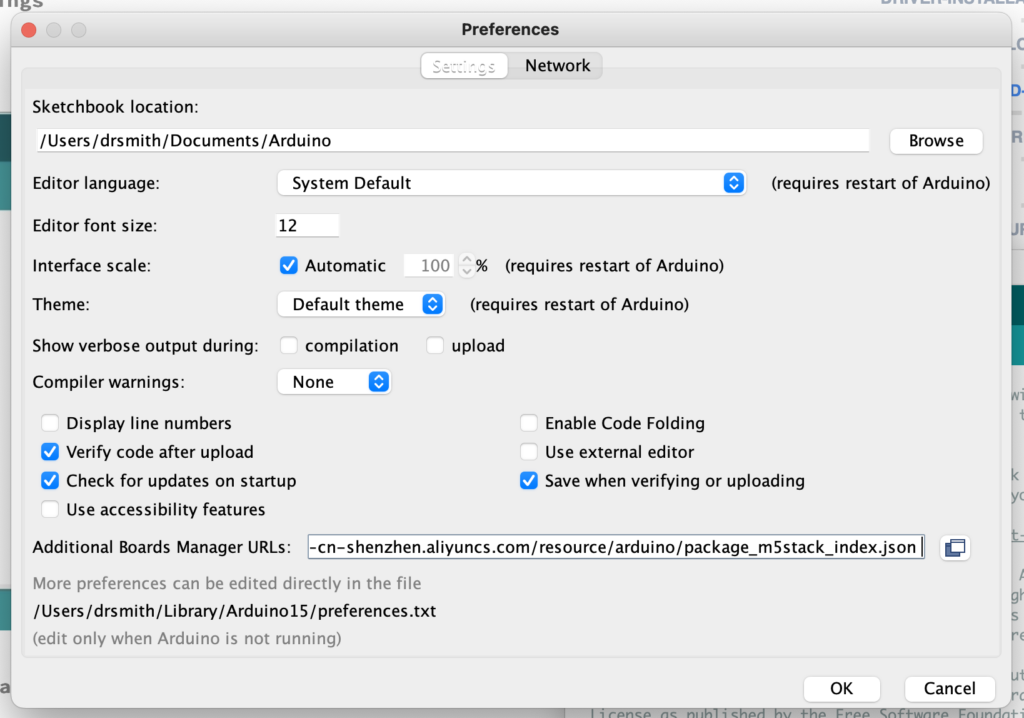
Next up, it's time to update the Arduino IDE as per the M5Stack page. There's actually a specific page for the Core2 AWS module.
In Settings or Preferences, we set a new lookup page for source files:
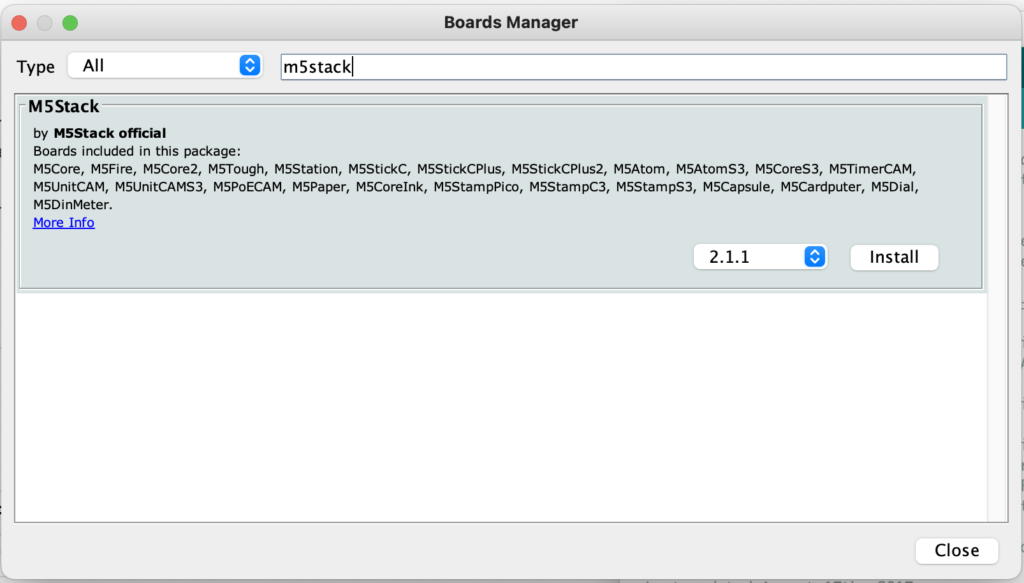
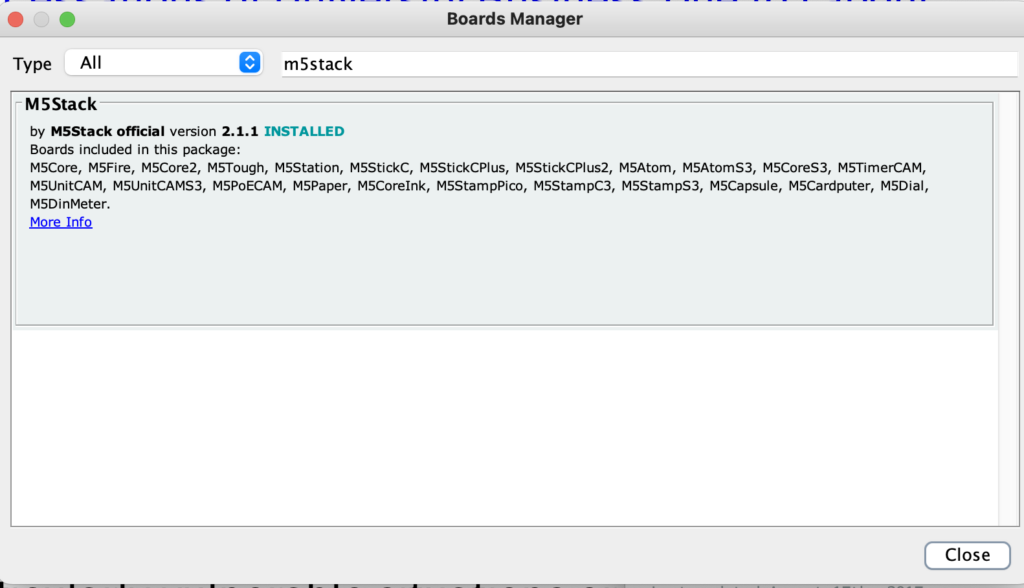
And then Tools -> Boards -> Boards Manager
then search for m5stack:
Downloading...
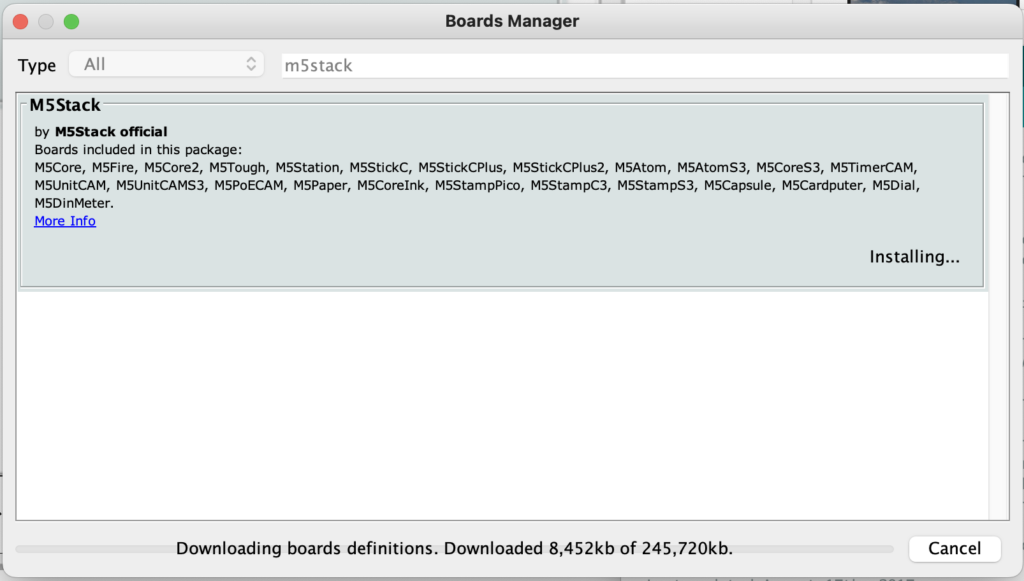
and installed.
and now I can spot the M5 board options in the Tools -> Board menu:
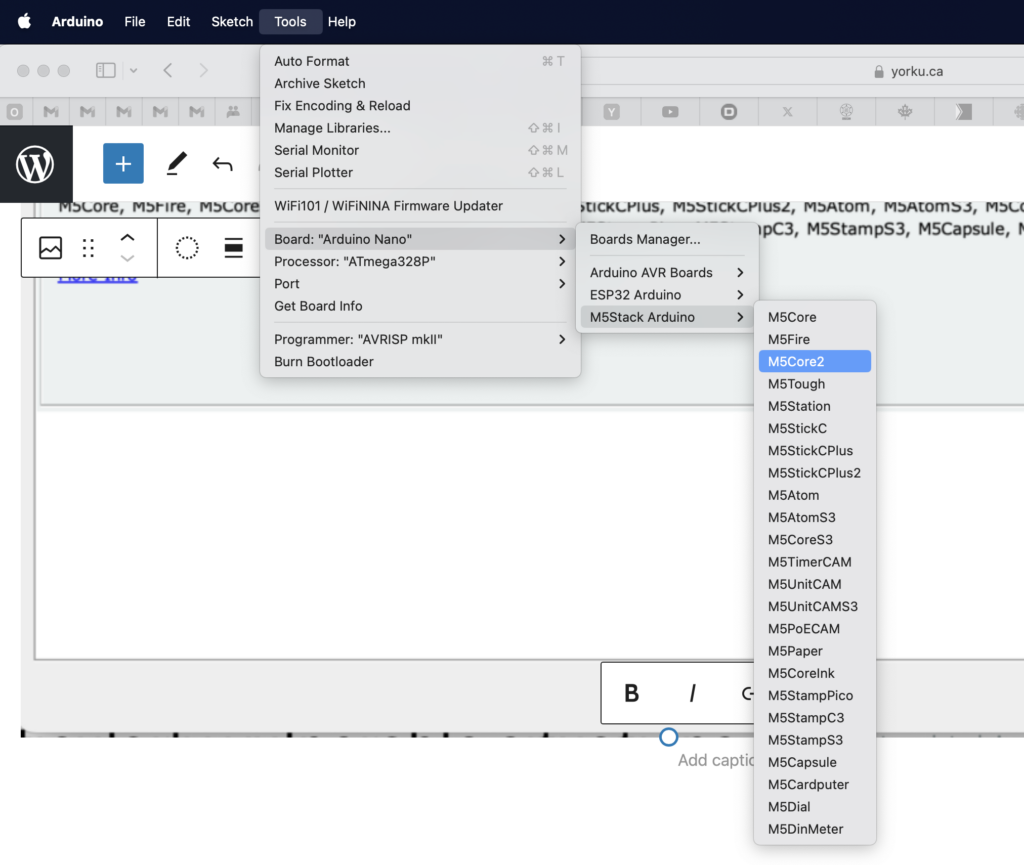
Once I select an M5 board, I can then use the examples found in File -> Examples, as we can see here:
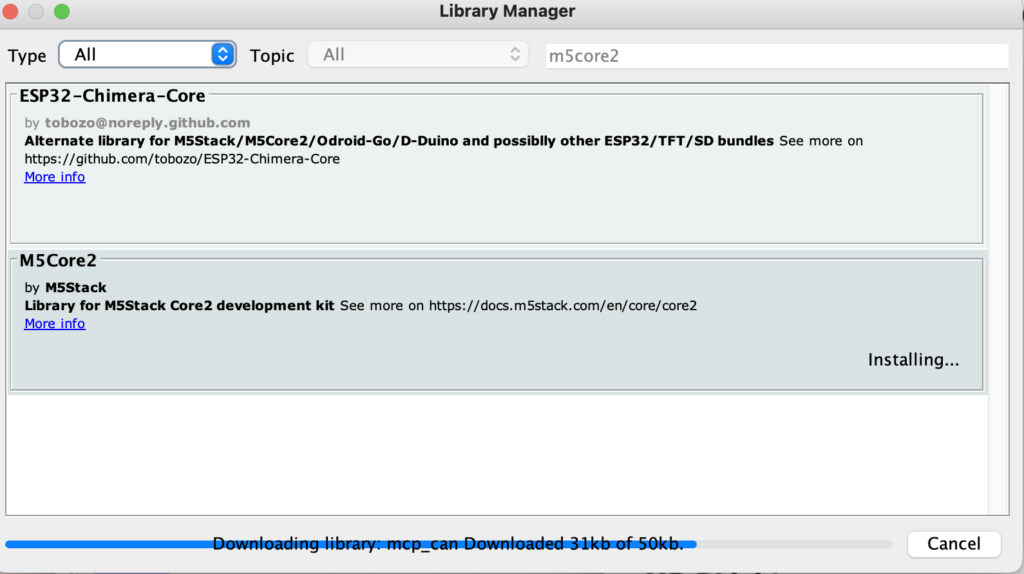
But now I need to get specific files for the M5Stack Core 2 board. So, I open up the Arduino Library Manager and type in m5core2:
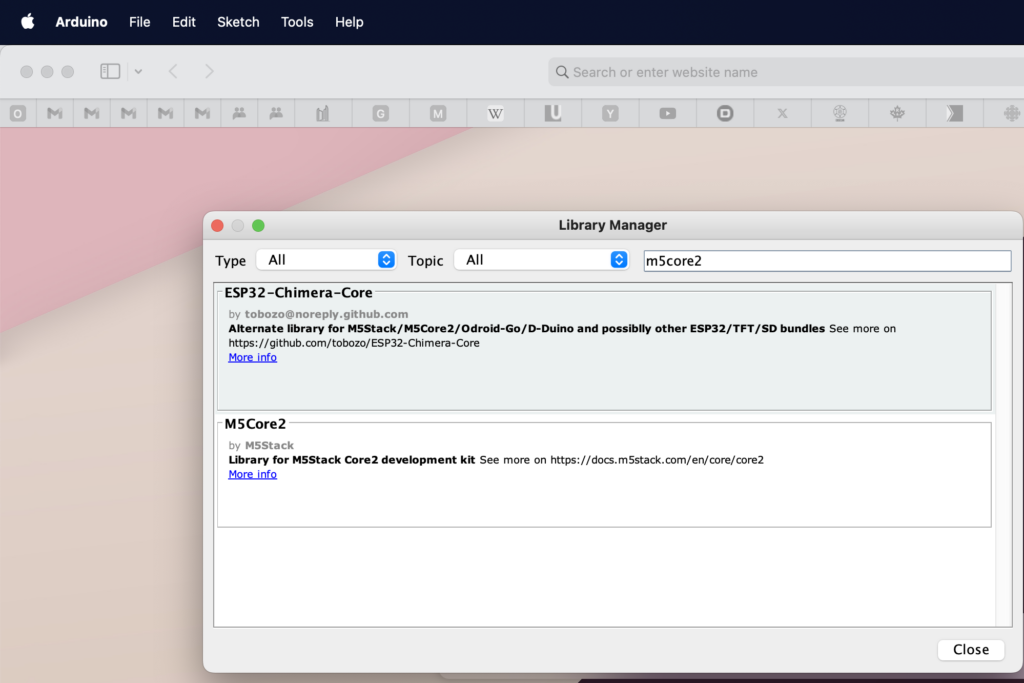
which generates a very, very long window that I can't navigate because it's taller than my 14" screen:
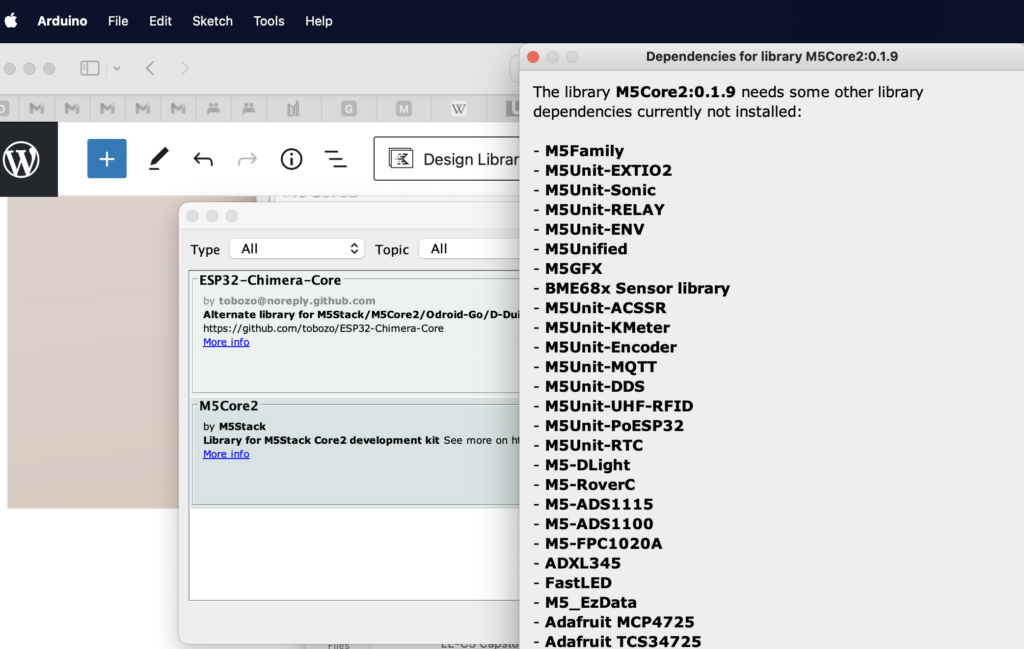
I couldn't see the bottom, so, in desperation, I then pressed tab-space or space-tab and maybe enter and then it started downloading...

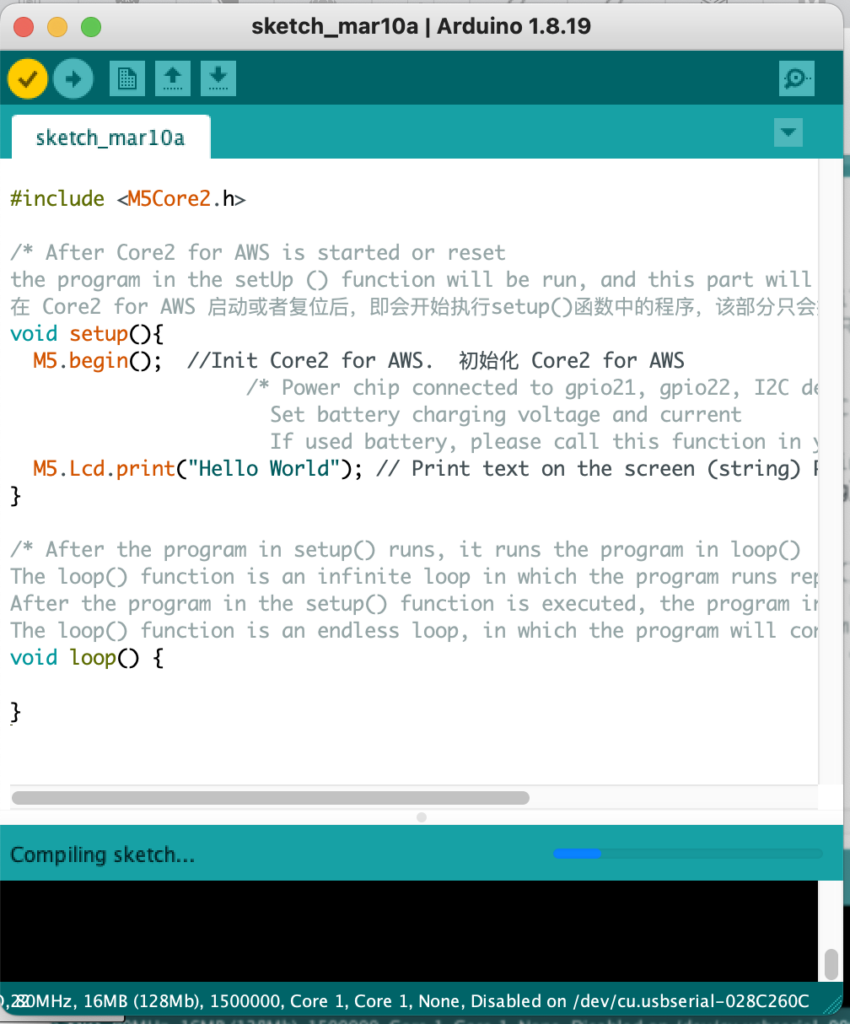
I then opened a blank Arduino project and pasted in the following sample code from the Core2 page:
#include <M5Core2.h>

/* After Core2 for AWS is started or reset
the program in the setUp () function will be run, and this part will only be run once.
在 Core2 for AWS 启动或者复位后,即会开始执行setup()函数中的程序,该部分只会执行一次。 */
void setup(){
  M5.begin();  //Init Core2 for AWS.  初始化 Core2 for AWS
                    /* Power chip connected to gpio21, gpio22, I2C device
                      Set battery charging voltage and current
                      If used battery, please call this function in your project */
  M5.Lcd.print("Hello World"); // Print text on the screen (string) Print text on the screen (string)
}

/* After the program in setup() runs, it runs the program in loop()
The loop() function is an infinite loop in which the program runs repeatedly
After the program in the setup() function is executed, the program in the loop() function will be executed
The loop() function is an endless loop, in which the program will continue to run repeatedly */
void loop() {

}
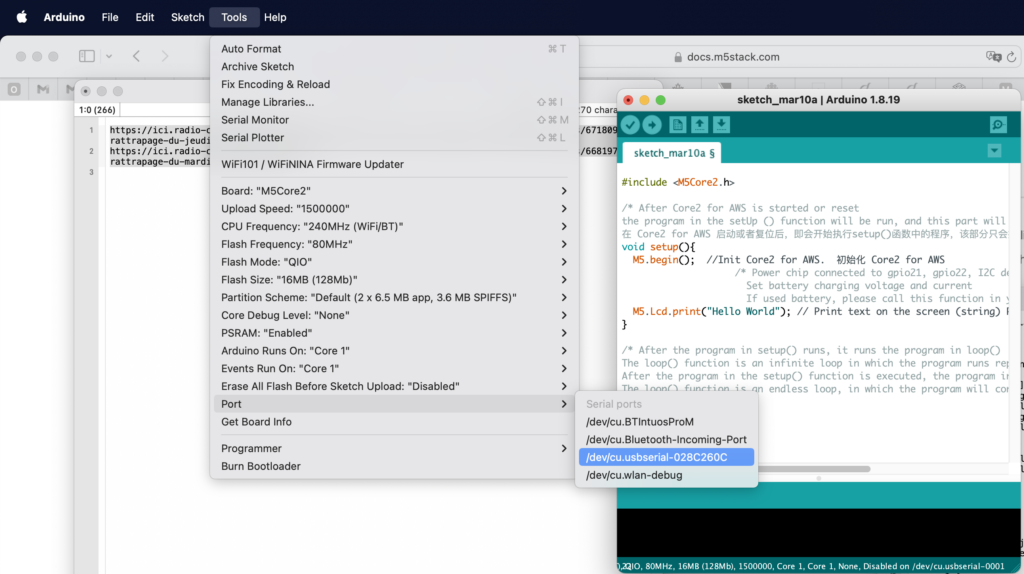
Once pasted in I then chose the right serial port via the Tools->Port menu:
compiled...
and then uploaded to the board....
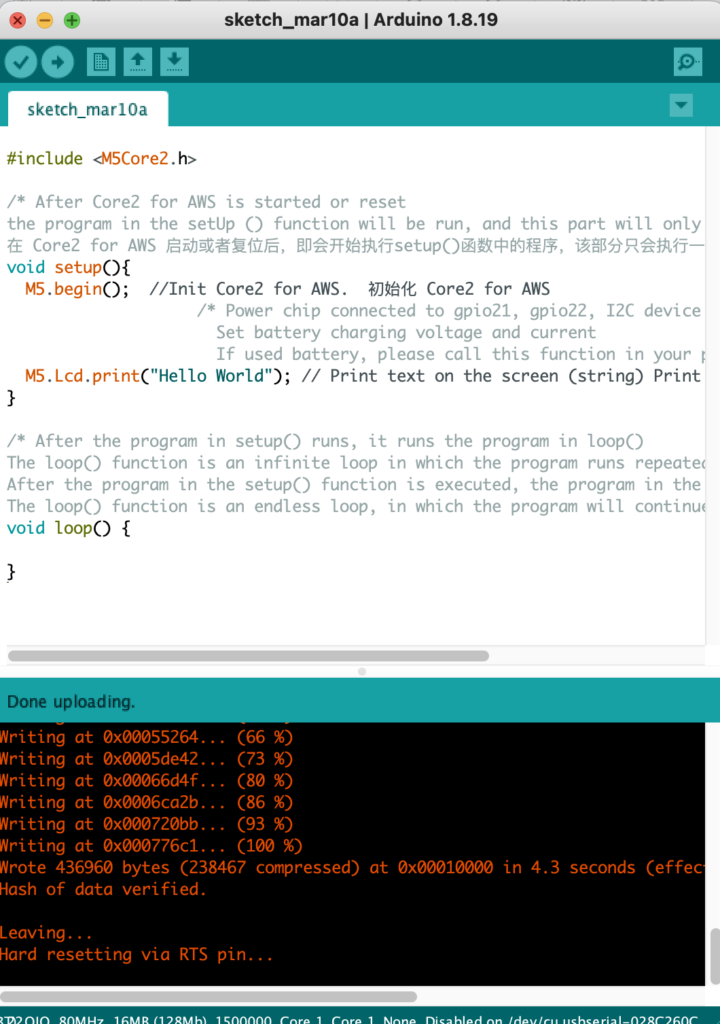
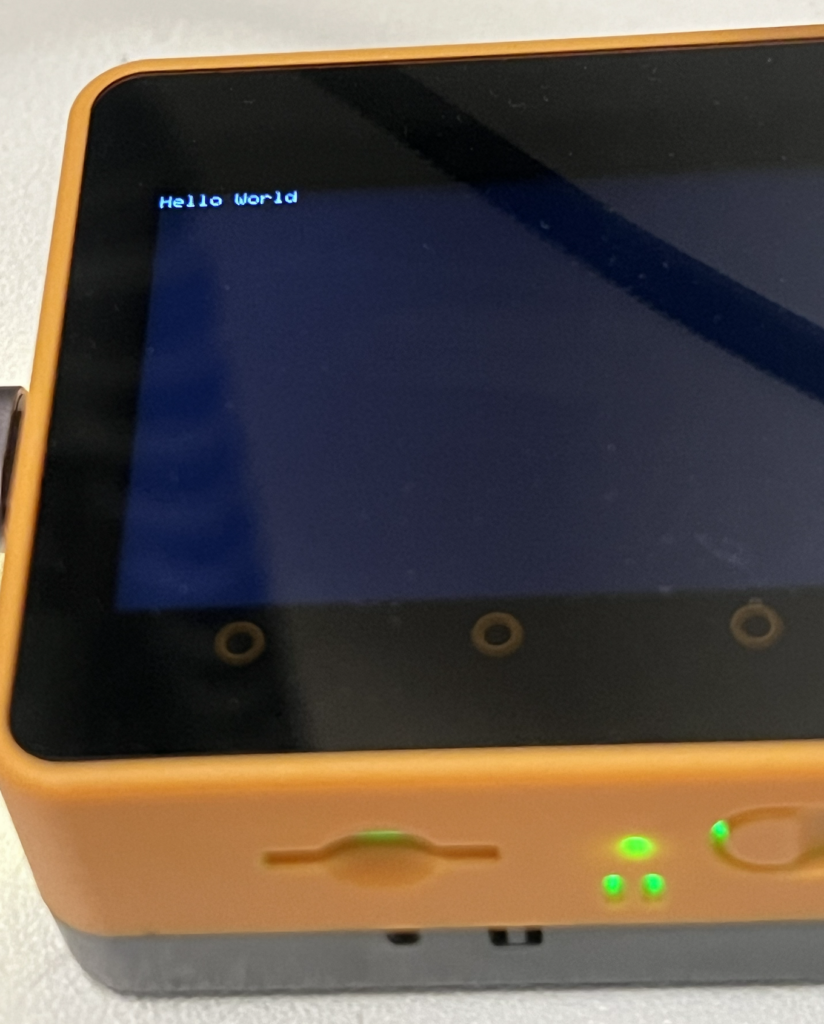
and it worked.
Conclusion
The M5Stack is a really, really interesting system. Lots of compelling features. I can see why hobbyists, engineers and students will want to use it. That said, at this stage, this is a whole lot more work than a regular Arduino to get set up and is, as I've seen in intro videos online, not an appropriate "first board" for novices. There are too many finicky steps where things can go wrong. That said, the steps are clear for someone with experience. They're doable. And it's cool that it works. Hats off to the M5Stack people for making this work in the Arduino IDE.
I'm really looking forward to seeing how this can be integrated into some other projects. The ESP32 at the core of the M5Stack is really something else. The potential for LoRA projects, for music projects, for weather stations and things that integrate with Lego Technic... wow.
I'm jazzed about the potential for M5Stack. They're filled with features, are priced competitively and integrate with both existing tools and new ones.

James Andrew Smith is a Professional Engineer and Associate Professor in the Electrical Engineering and Computer Science Department of York University's Lassonde School, with degrees in Electrical and Mechanical Engineering from the University of Alberta and McGill University. Previously a program director in biomedical engineering, his research background spans robotics, locomotion, human birth and engineering education. While on sabbatical in 2018-19 with his wife and kids he lived in Strasbourg, France and he taught at the INSA Strasbourg and Hochschule Karlsruhe and wrote about his personal and professional perspectives. James is a proponent of using social media to advocate for justice, equity, diversity and inclusion as well as evidence-based applications of research in the public sphere. You can find him on Twitter. Originally from Québec City, he now lives in Toronto, Canada.