Step 1 - Configure your device to obtain network settings automatically
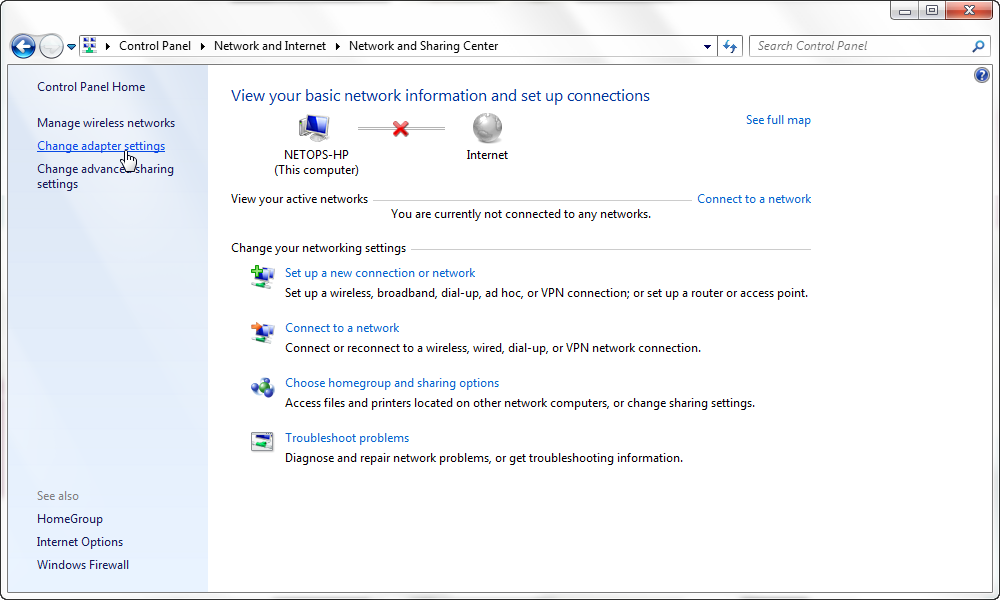
- From the Start menu, select Control Panel, Network and Internet and Network and Sharing Center.

- Select Change Adapter Settings from the left-hand sidebar.
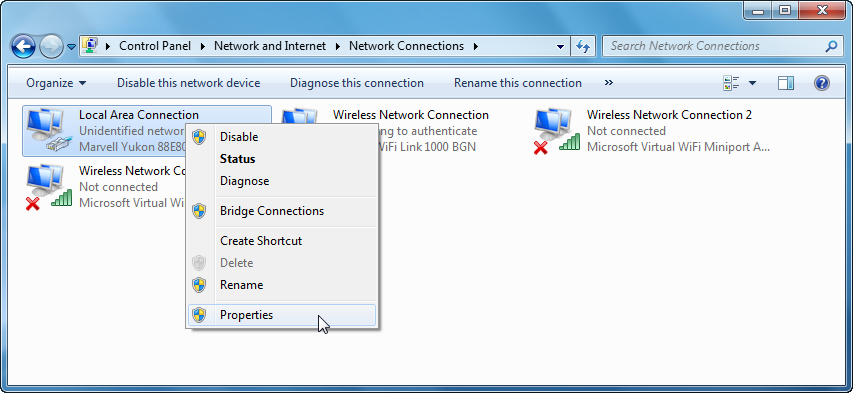
- In the Network Connections window, right-click on the Local Area Connection icon and select Properties.
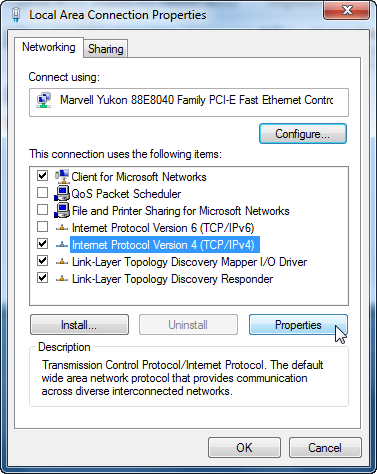
- In the Local Area Connection Properties window, ensure Client for Microsoft Networks and Internet Protocol Version 4 (TCP/IPv4) have check marks. Select Internet Protocol Version 4 (TCP/IPv4) and click Properties.
- In the General tab, ensure Obtain an IP address automatically and Obtain DNS server address automatically.
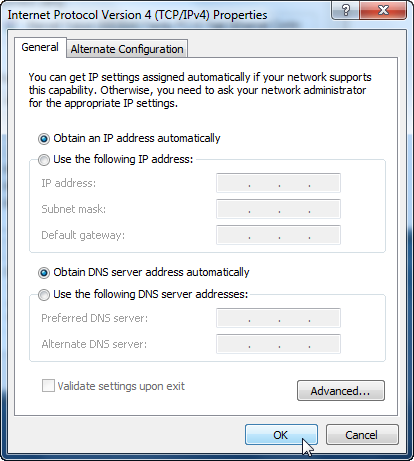
- Click OK to close all open windows.