Skip to main content Skip to local navigation
Home » Services » Student Drop-In

Student Drop-In

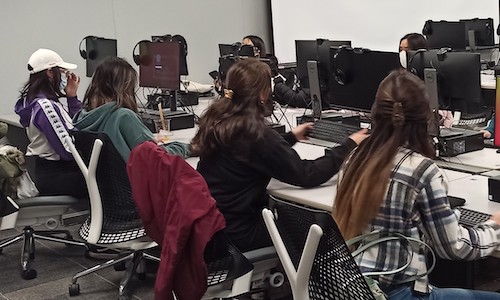
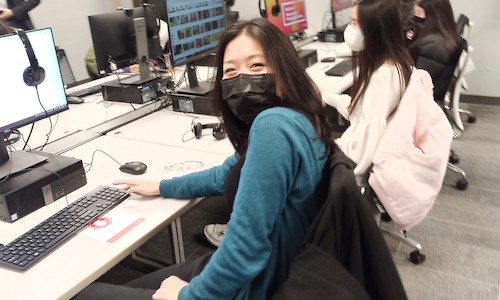
Want to take advantage of the open-access space at the MLC? Drop in and study with other students. Our computers are here to help you learn language in unique ways, at your own pace, with software that supports language learning through concordance, audio and video recording, variable rule analysis, writing exercises and more.

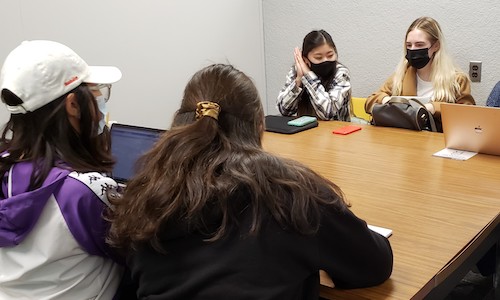
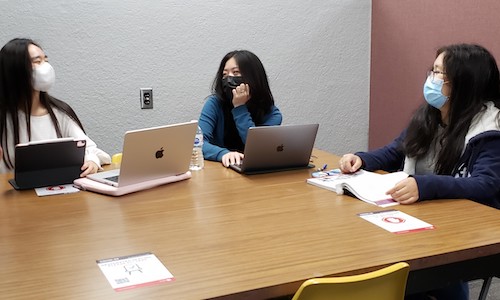
If you want to study with others, the MLC has space for groups too! Simply submit a booking request ahead of your next visit and we will reserve your spot if one of our group rooms is available on the requested time and date.

Note: The open-access space in South Ross 117 is currently closed.

Frequently Asked Questions

Please note: the print system at the MLC uses the YU-card and not the Library Print Card. You can deposit funds onto your card through the online system, or in-person at the YU-card Office located in Room 200 of the William Small Centre. You can also use the card dispenser/loader located in Scott Library to add money onto your YU-card.

How to print:

  • Login to your workstation.
  • Select "print" from the application you are using.
  • After clicking ‘OK’ to print, a pop-up window will appear.
  • In the pop-up window, enter your Passport York username and password and click on ‘Sign in’.
  • The print job you submitted will appear with the number of pages and cost.
  • Click on the empty box next to the print job.
  • Then select on ‘Pay at Station’.

How to release your print job:

  • Go to the release station and enter your Passport York username and password.
  • The jobs you have submitted will show up on the screen.
  • Click and highlight the jobs you want to print.
  • The total cost will appear at the bottom of the screen.
  • Click on ‘Continue’.
  • ‘Swipe YU-card’ will flash. Swipe your card.
  • Click on ‘Pay and Print’ to complete (money will not be deducted from your card until you click on ‘Pay and Print’).
  • Click ‘Cancel’ button to finish.
  • Pick up your print job at the printer.

Typing accents is easy using the US international keyboard, which is installed on the MLC computers.

The apostrophe becomes a "dead key" so that it can be used in combinations to produce accented characters. (To type an apostrophe, you must type apostrophe and then press the space bar. To obtain quotation marks, type them (shift apostrophe) and then press the space bar.)

Below is a list of the most common accents and punctuation marks and how to type them. To obtain an accent on a capital letter, type shift plus the letter in question. Please note: when you are typing the following accents, nothing appears on the screen until you type the vowel or consonant to be accented.

For the acute accent, type the apostrophe plus any vowel (ex. é, É).

The circonflexe accent is located above the number 6. Type shift 6 followed by any vowel (ex. ê, Ê). Note: this is the sign used to mark long vowels in Latin.

The grave accent is located above the Tab key, to the left of the number 1. Type the accent plus any vowel (ex. à, À).

The tilde sign is located above the grave accent. Type it first followed by the letter (ex. ñ, Ñ).

The cédille is obtained by typing the apostrophe, followed by the letter "c" (ex. ç, Ç).

The umlaut is obtained by typing the quotation marks (shift apostrophe) followed by any vowel (ex. ë, Ë).

To obtain the German consonant "ß" hold down right Alt key and type the letter "s".

To obtain inverted punctuation marks ¿ and ¡ for Spanish, hold down right Alt key and type ? to obtain ¿, and type 1 to obtain ¡.

The MLC offers WORD 2016 with proofing tools for many of the languages taught at York University. For guidance on setting the desired language and proofing tools, and on the production of accents using the US international keyboard, please consult the guidesheet for using WORD 2016.

Other Guidelines

  • Save documents onto a USB key or to the "MLC X or F" drive which will save the documents on the York servers in a space reserved exclusively for you.
  • If you do not save on "MLC X or F" drive, you will lose the file that you worked on.
  • When leaving the MLC, remember to log off.

To record audio on an MLC computer, you can use either Audacity or SoundForge. We've included instructions for both of these programs on our Guidesheets page.

Zoom Recording Instructions

  1. Open Zoom on MLC computer.
  2. Login to Zoom using your York credentials.
  3. Begin a new meeting. Join the meeting with computer audio.
  4. At the bottom, there is a taskbar. Click the record button. Both the video and audio of the Zoom meet will start recording.
    • To pause the recording, click the pause button on the bottom taskbar. You may click resume to resume the recording.
    • To stop the recording, click the stop button on the bottom taskbar.
  5. To convert the file, end the meeting. The video recording will be converted into an mp4 file once the meeting has ended for all participants.
  6. Once the meeting has ended, the recording will automatically show up in your Folders. There will be a video file that contains both the video and audio recording, and simply an audio recording of the Zoom call.
  7. You may choose to export the recordings as is most suitable for your needs. Ensure the files are exported and/or saved elsewhere, as they will not save on the MLC computers after signing out.

You can upload files to eClass while working from an MLC computer, or while logged in from another location. For step-by-step instructions, head to the Learning Technology Services website.

You can reserve a group study space at the MLC by submitting a request through our booking form.

Questions?

For more information about our group study and drop-in spaces, feel free to connect with us at lapsmlc@yorku.ca.